Aurora is designed for everyone—and for bringing everything together in one place. Projects offer structured management and clear traceability of your work, allowing you to collaborate, analyze, and manage data efficiently in real time.
Create your first project
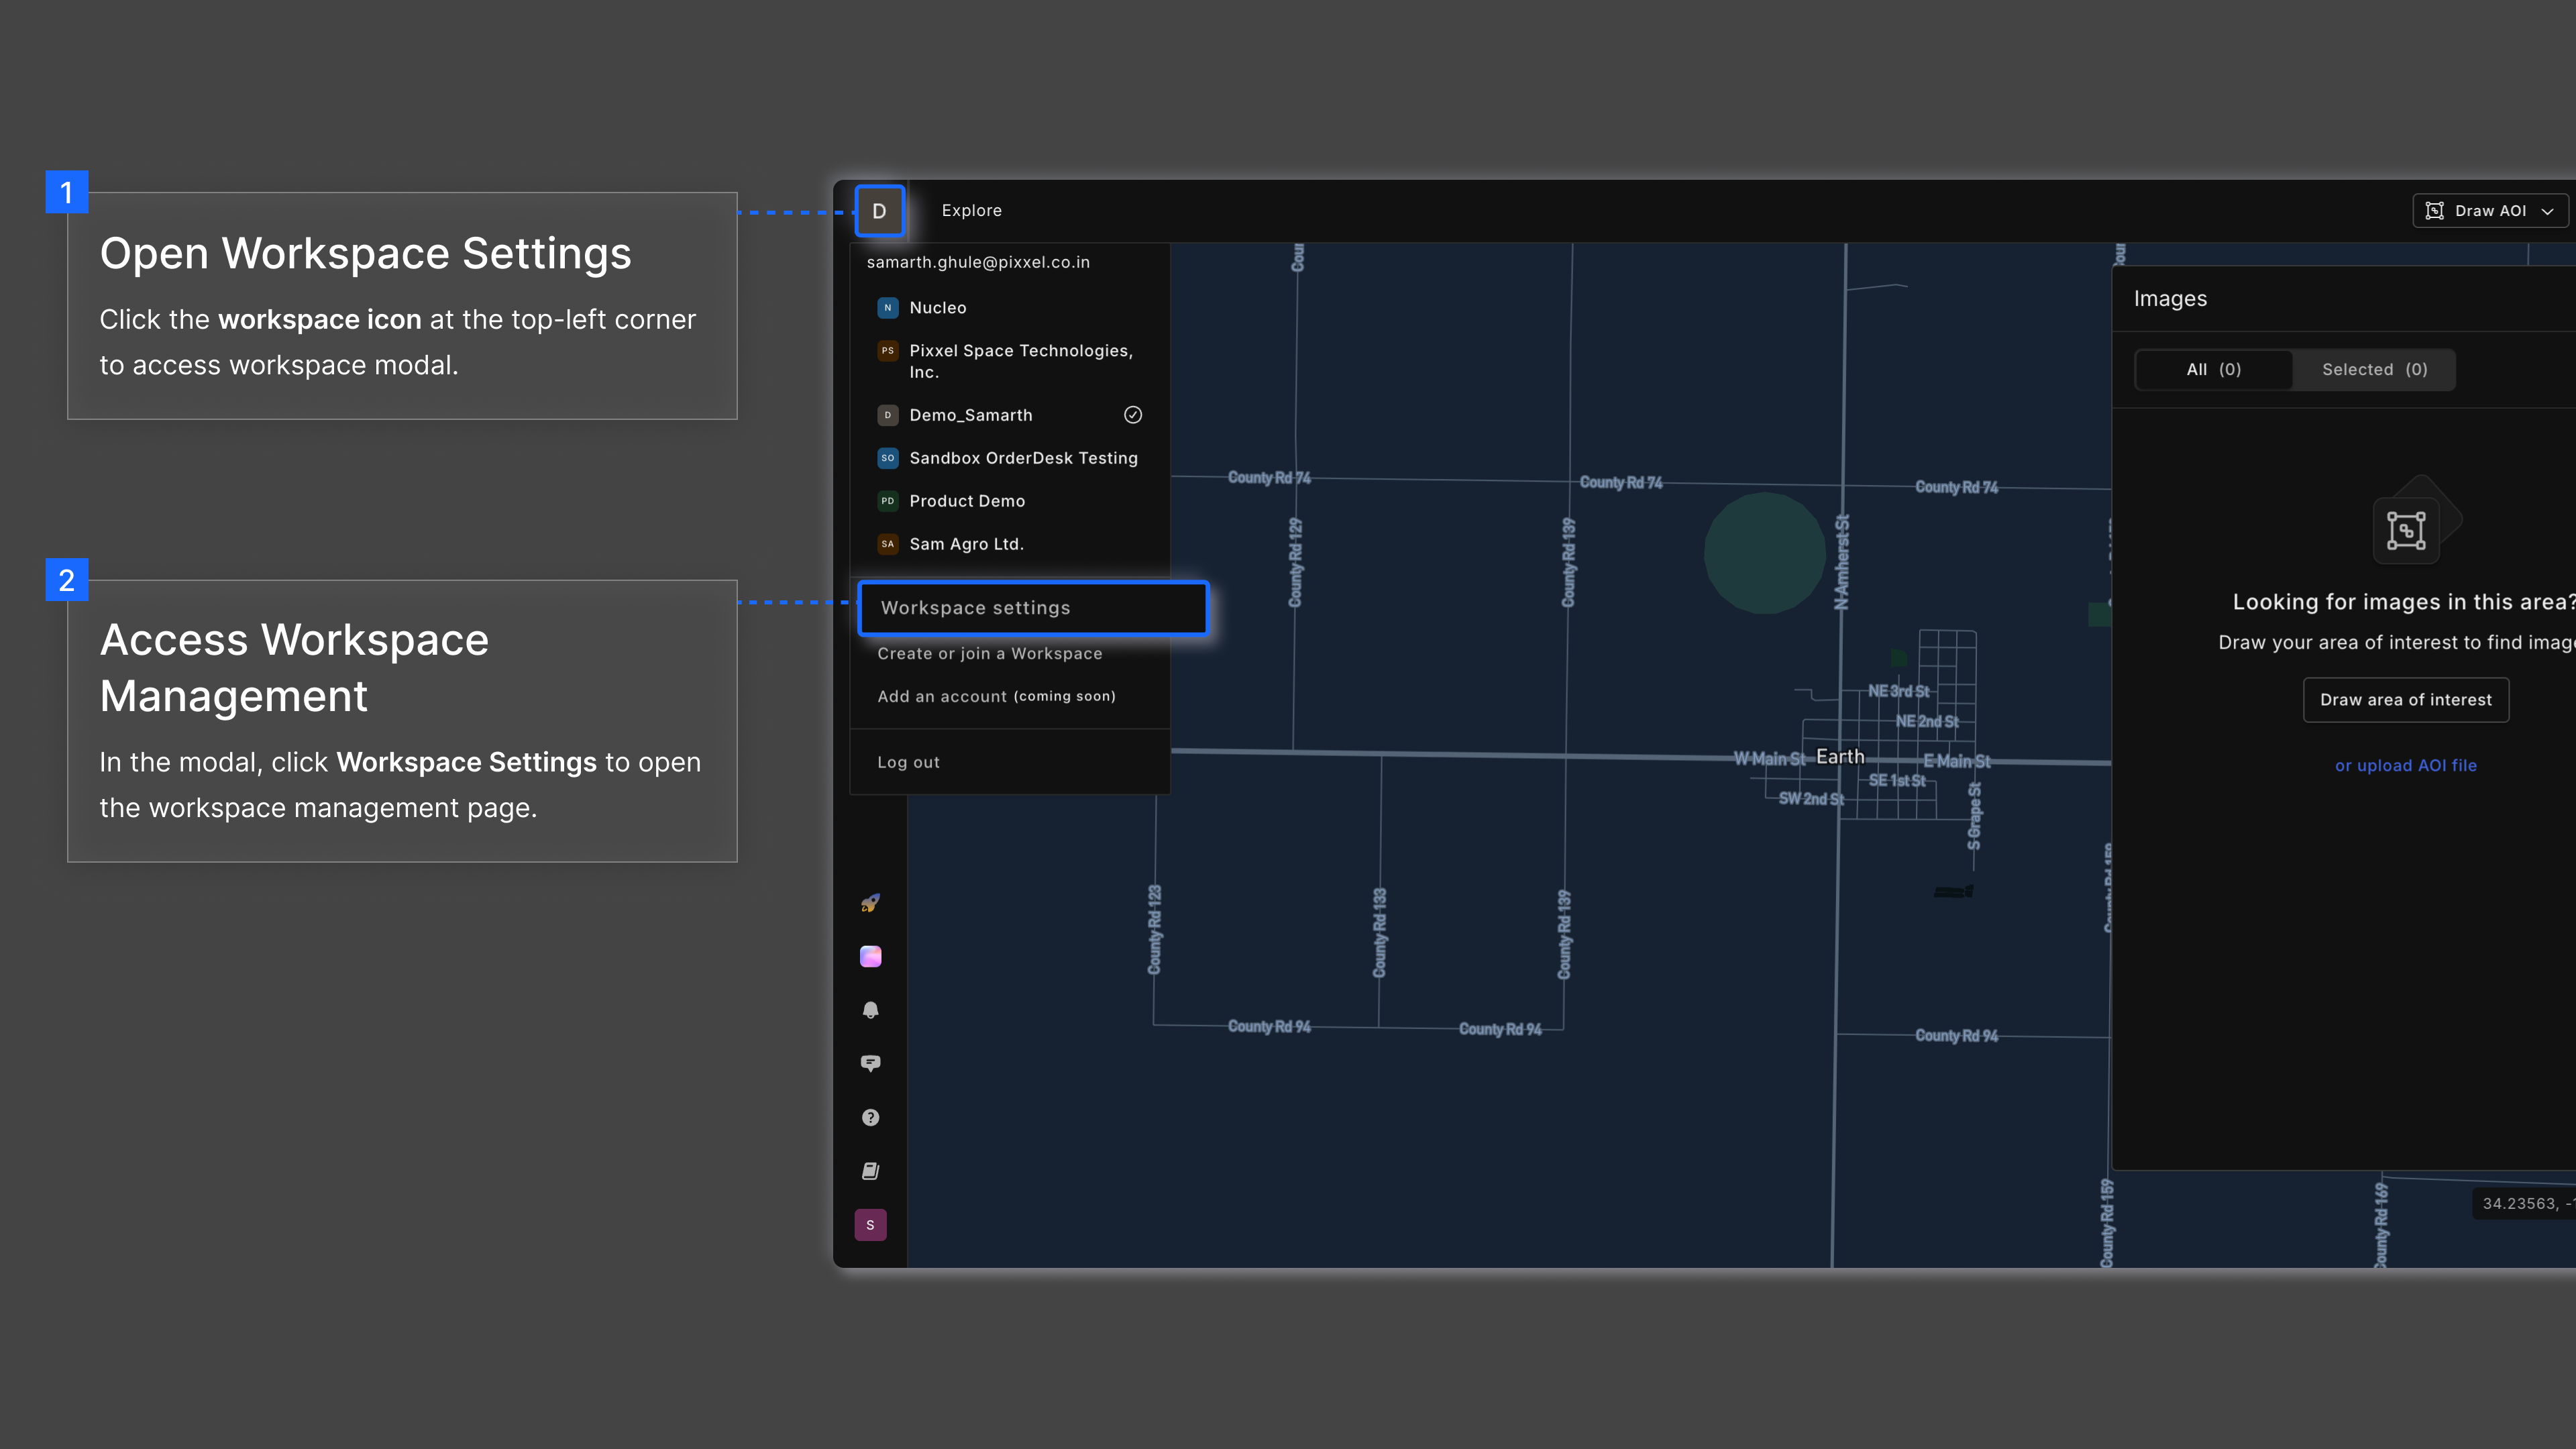
- Go to Workspace Settings.
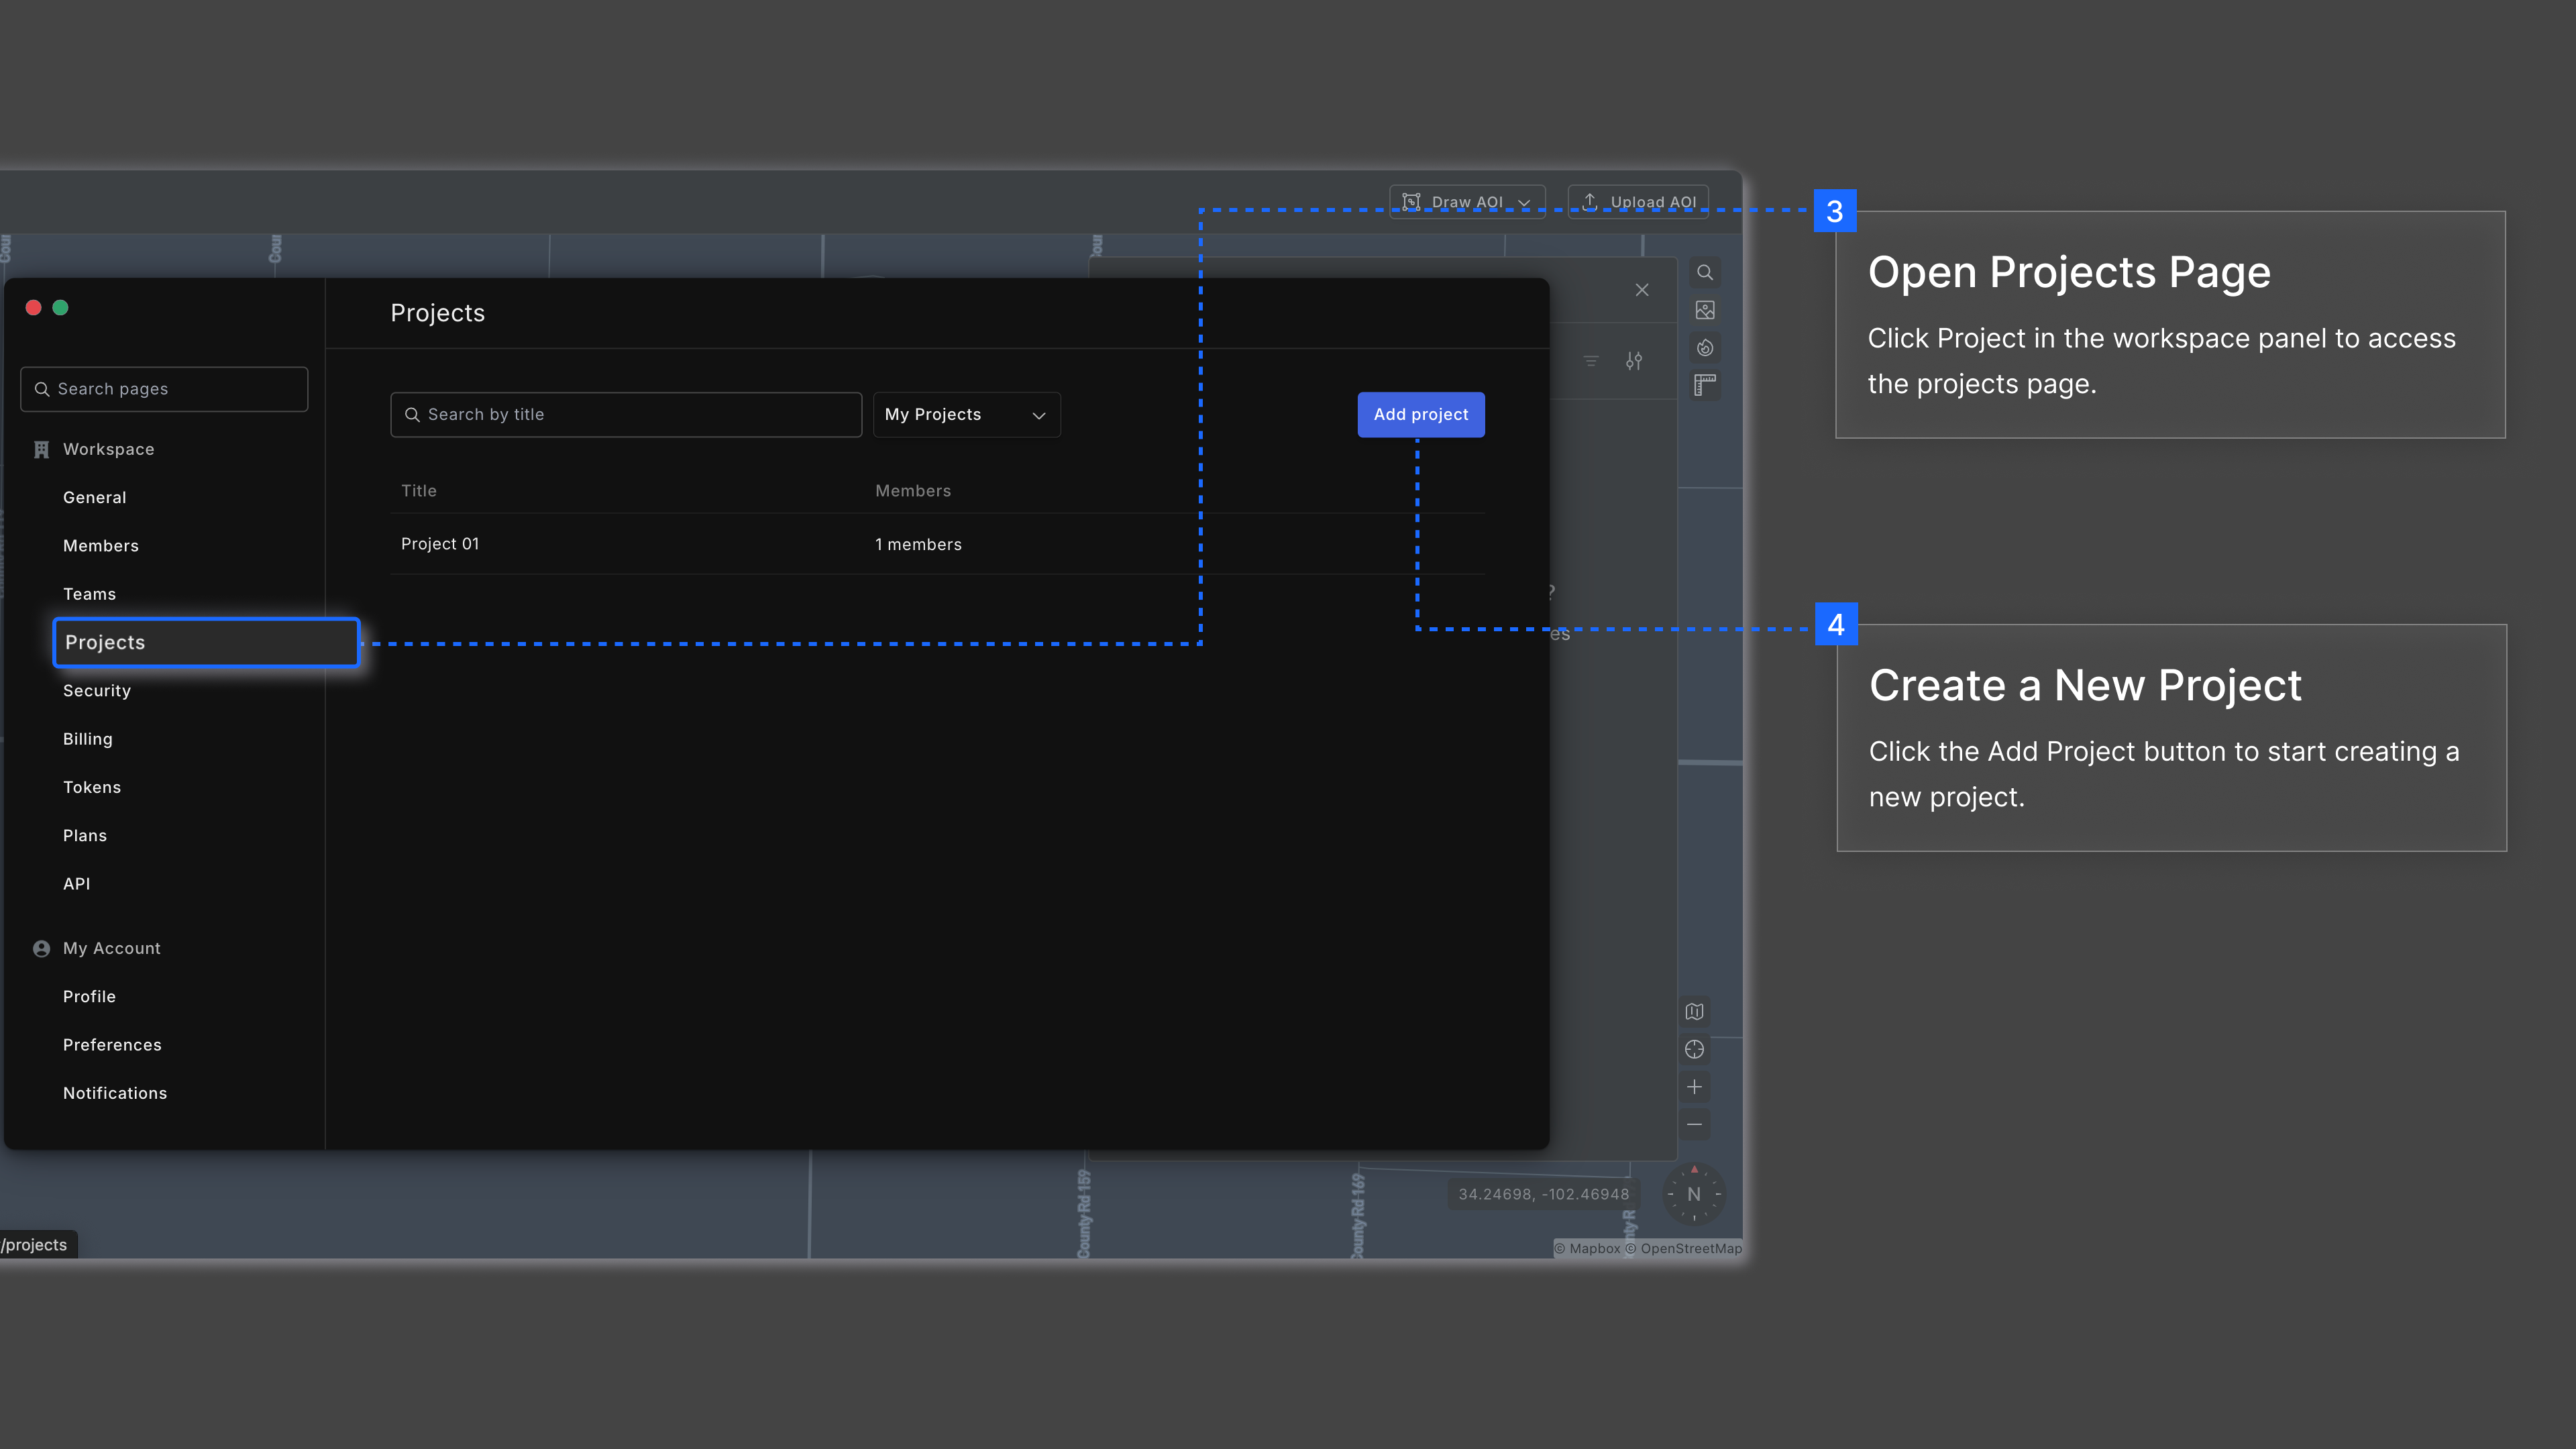
- Navigate to the Projects tab.
- Click on the Add Project button to create a new project.
- Enter a ‘Project Title’ and ‘Project Name’(Slug) to differentiate it from others. Don’t worry you can edit it later, too.
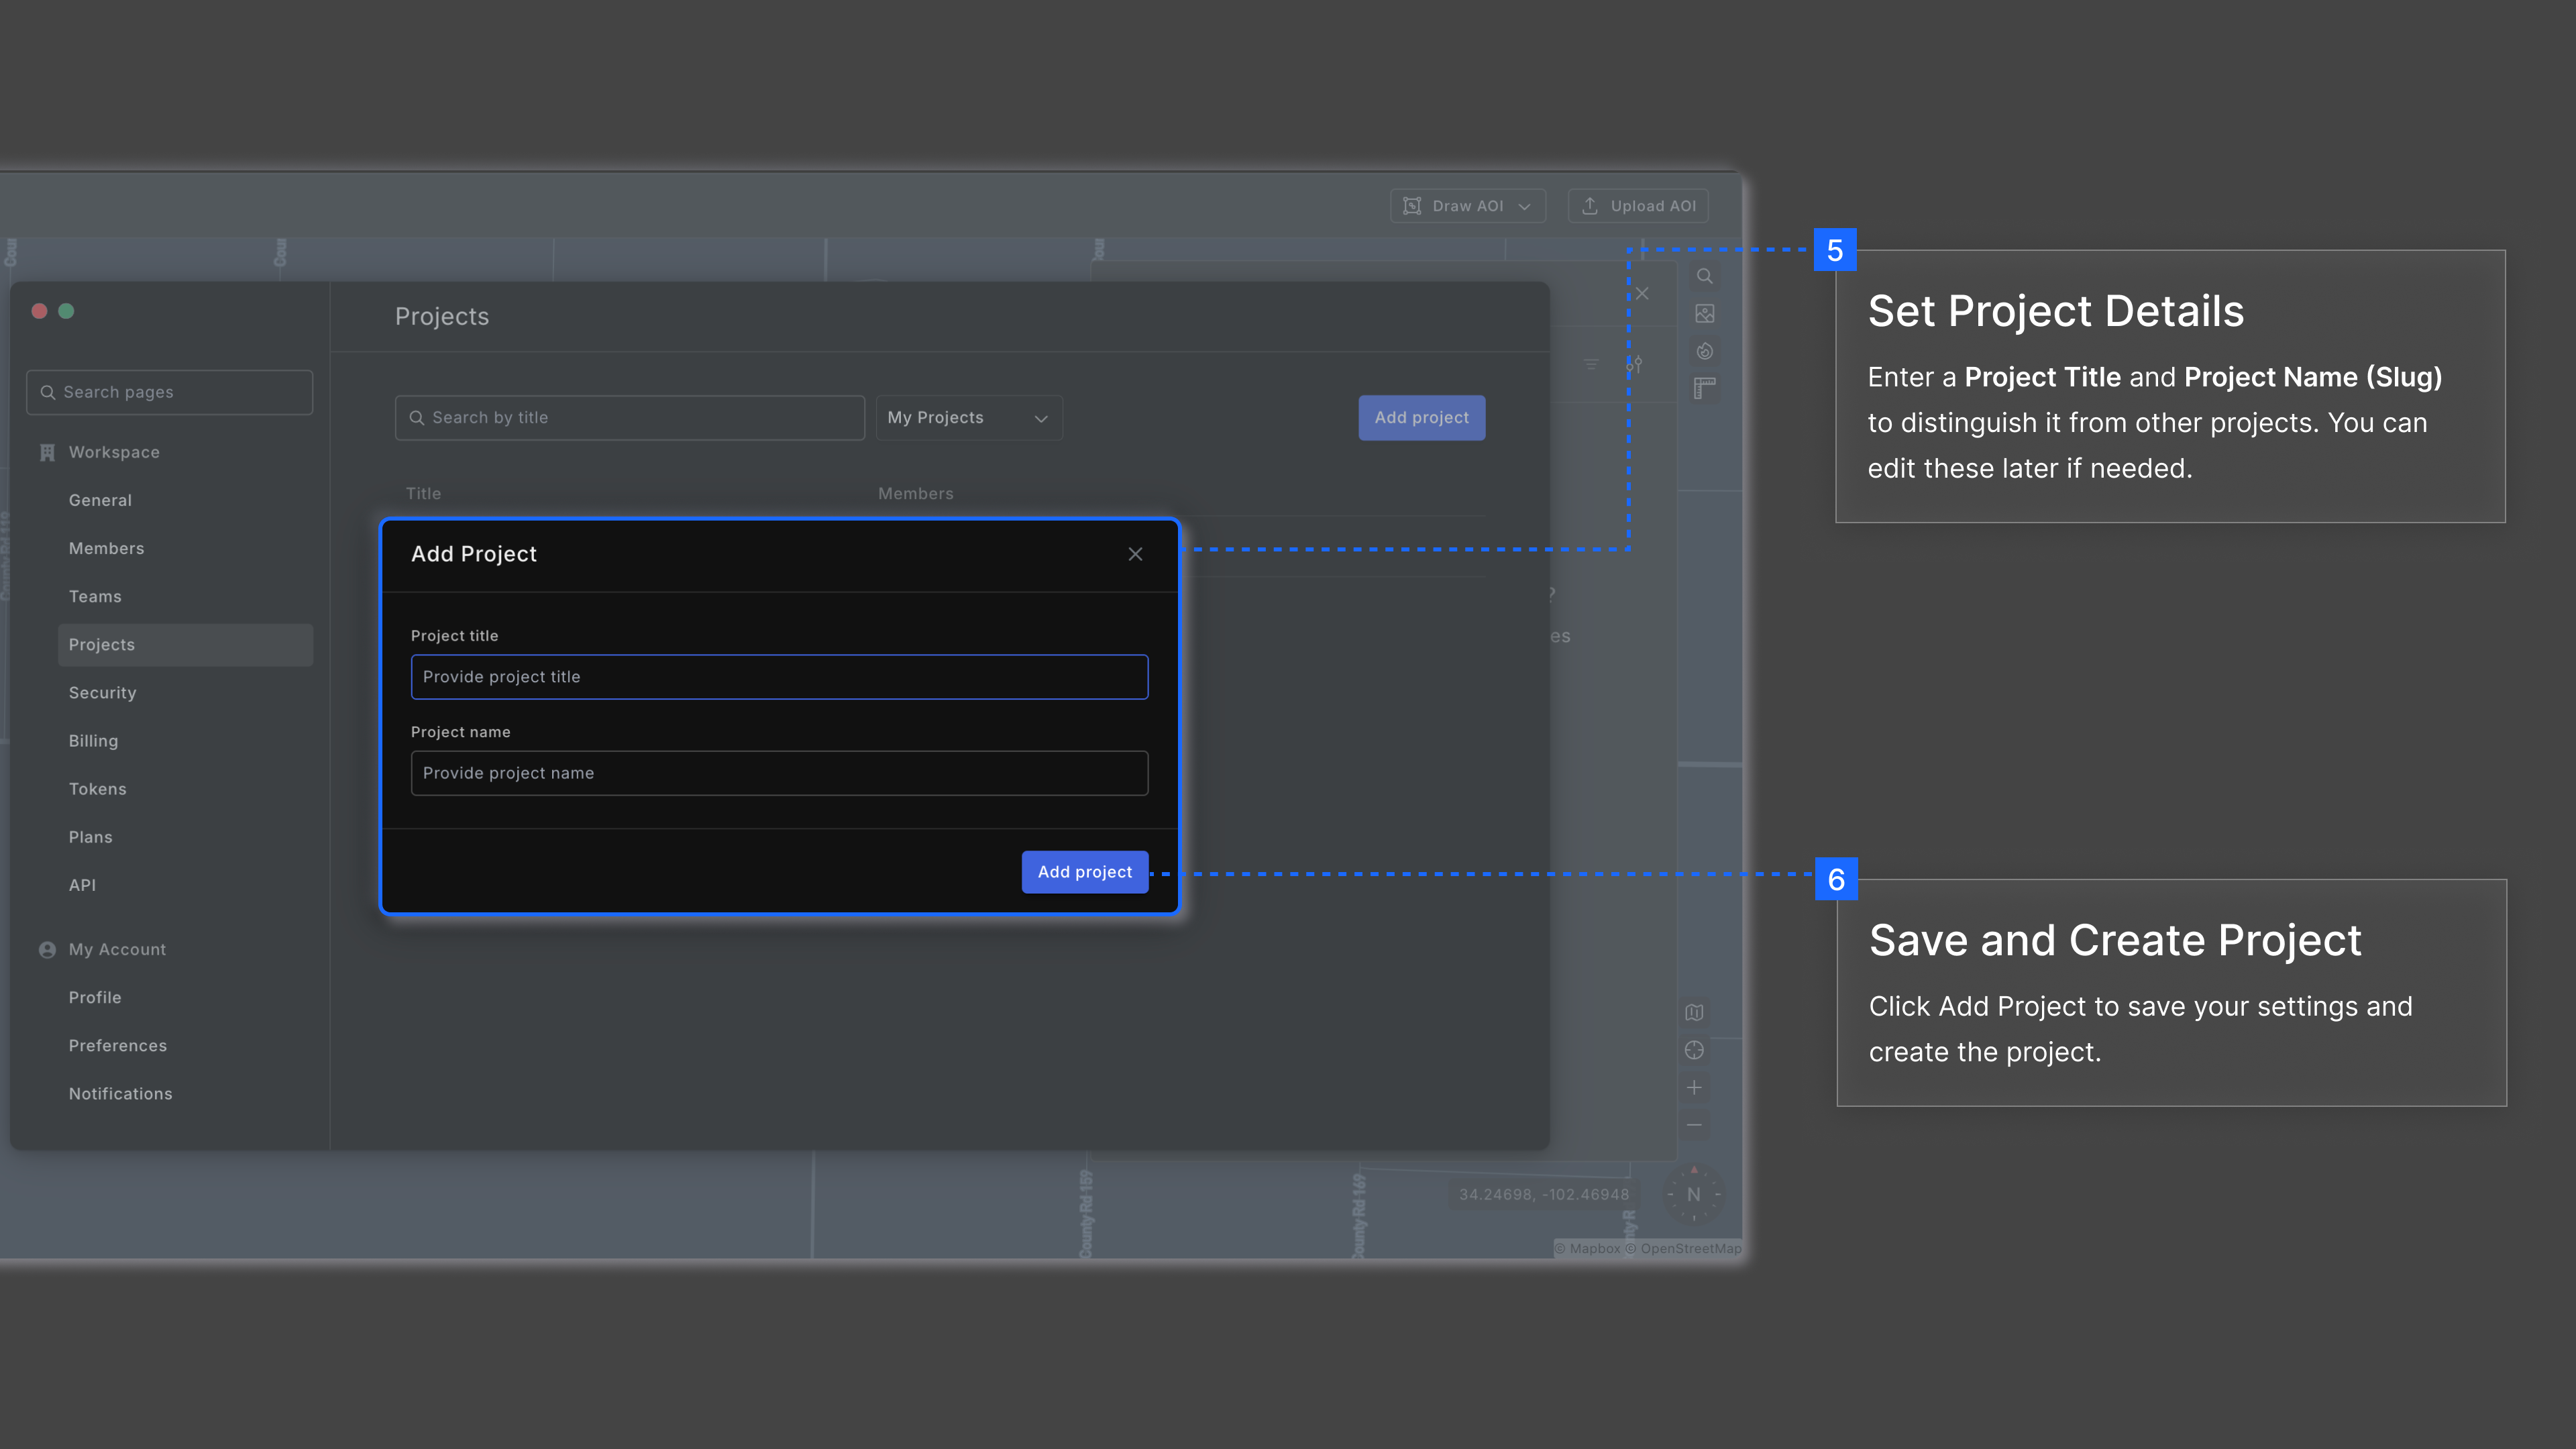
Note: Only numbers, letters, hyphens (-), and underscores (_) are allowed in Project Name. Spaces are not allowed.*
- Click on Save project to start working on your new project.
Adding members to a project
Projects are primarily created to manage work and enable collaboration. Adding members to a project allows team collaboration within that specific project. Project members will only have access to the content and activities within the project they are added to. To add members to a project, follow the instructions below:
- Go to Workspace Settings and open the Projects tab to view the list of projects you’ve created.
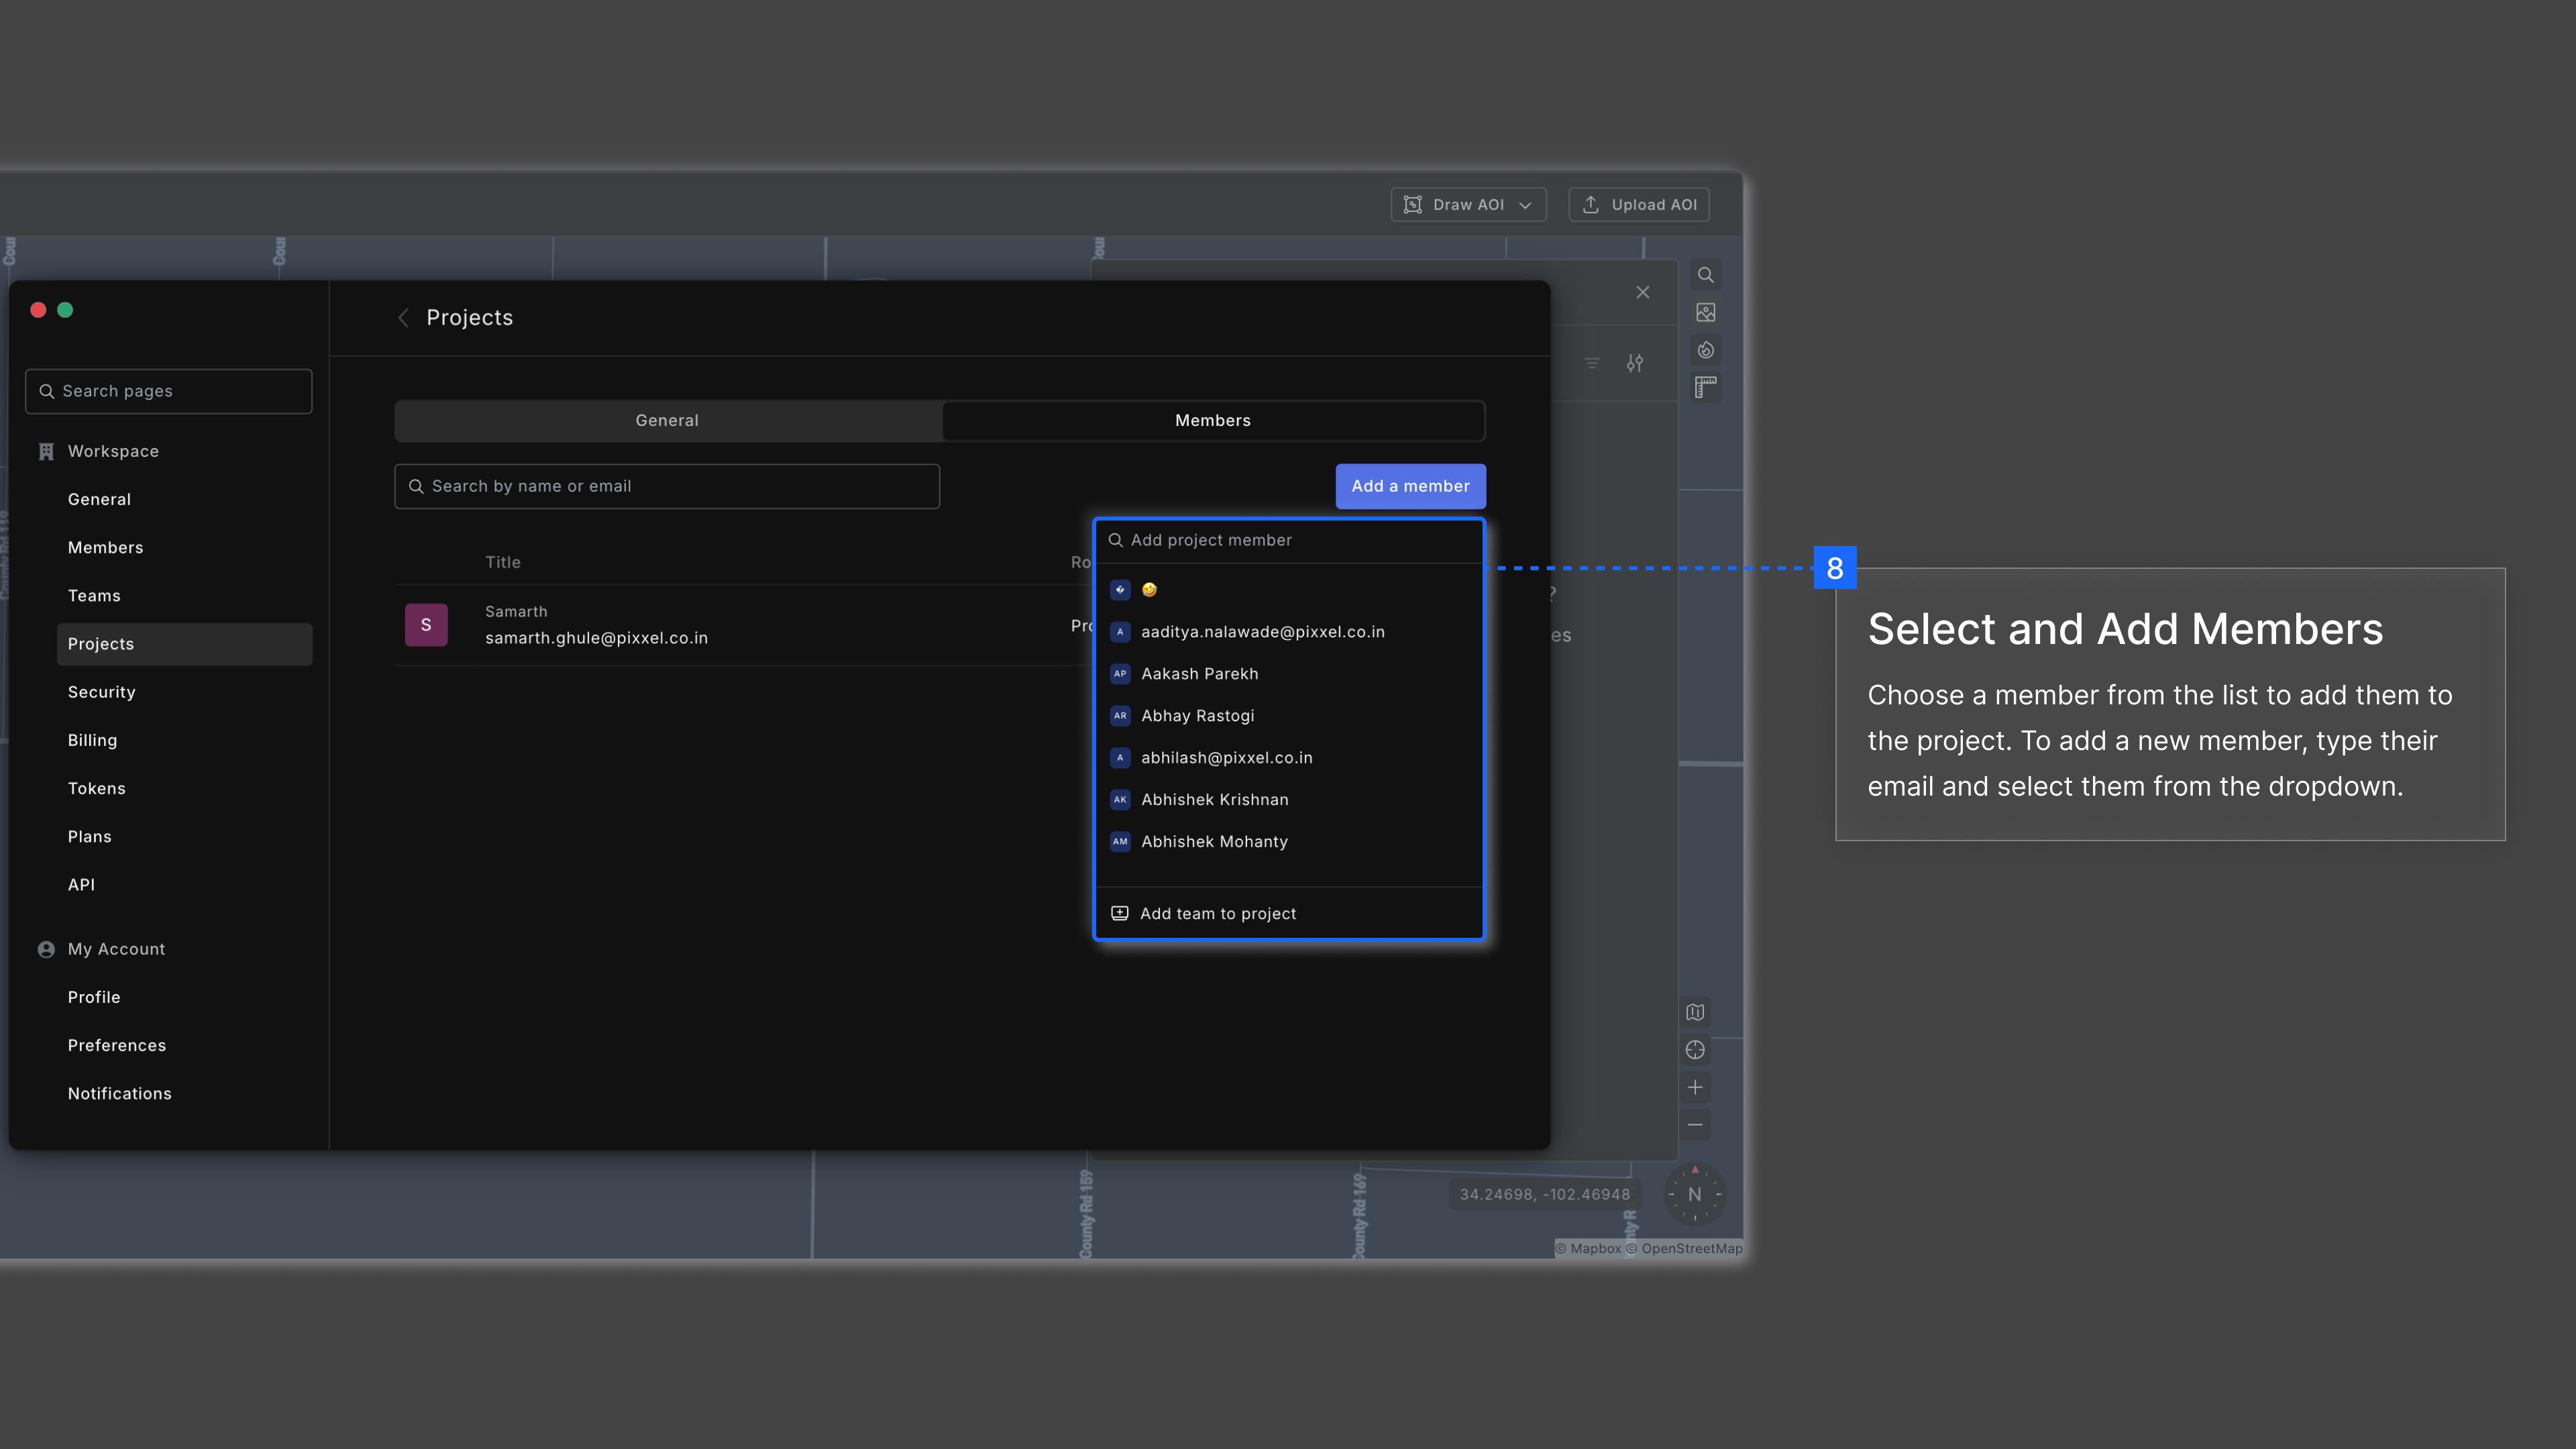
- Select the project you want to update and navigate to the Members tab.
- Click the Add Member button on the right.

- You’ll see a list of members from your workspace. To add someone new, type their email and select the user from the dropdown.
- To remove a member, click the three dots next to their name and select Remove.
Note: You must be the Project Owner to add or remove members.
Updating or Deleting a project
As mentioned earlier, only the Project Owner can edit project details. In addition to editing, the owner also has the option to delete the project if it’s no longer needed. Below are the steps to update or delete a project:
Updating a Project:- Open Workspace Settings and navigate to the Projects tab.
- Select the project you wish to update.
- Change the Project Title and/or Project Name as needed.
- Click Update Project to save the changes.
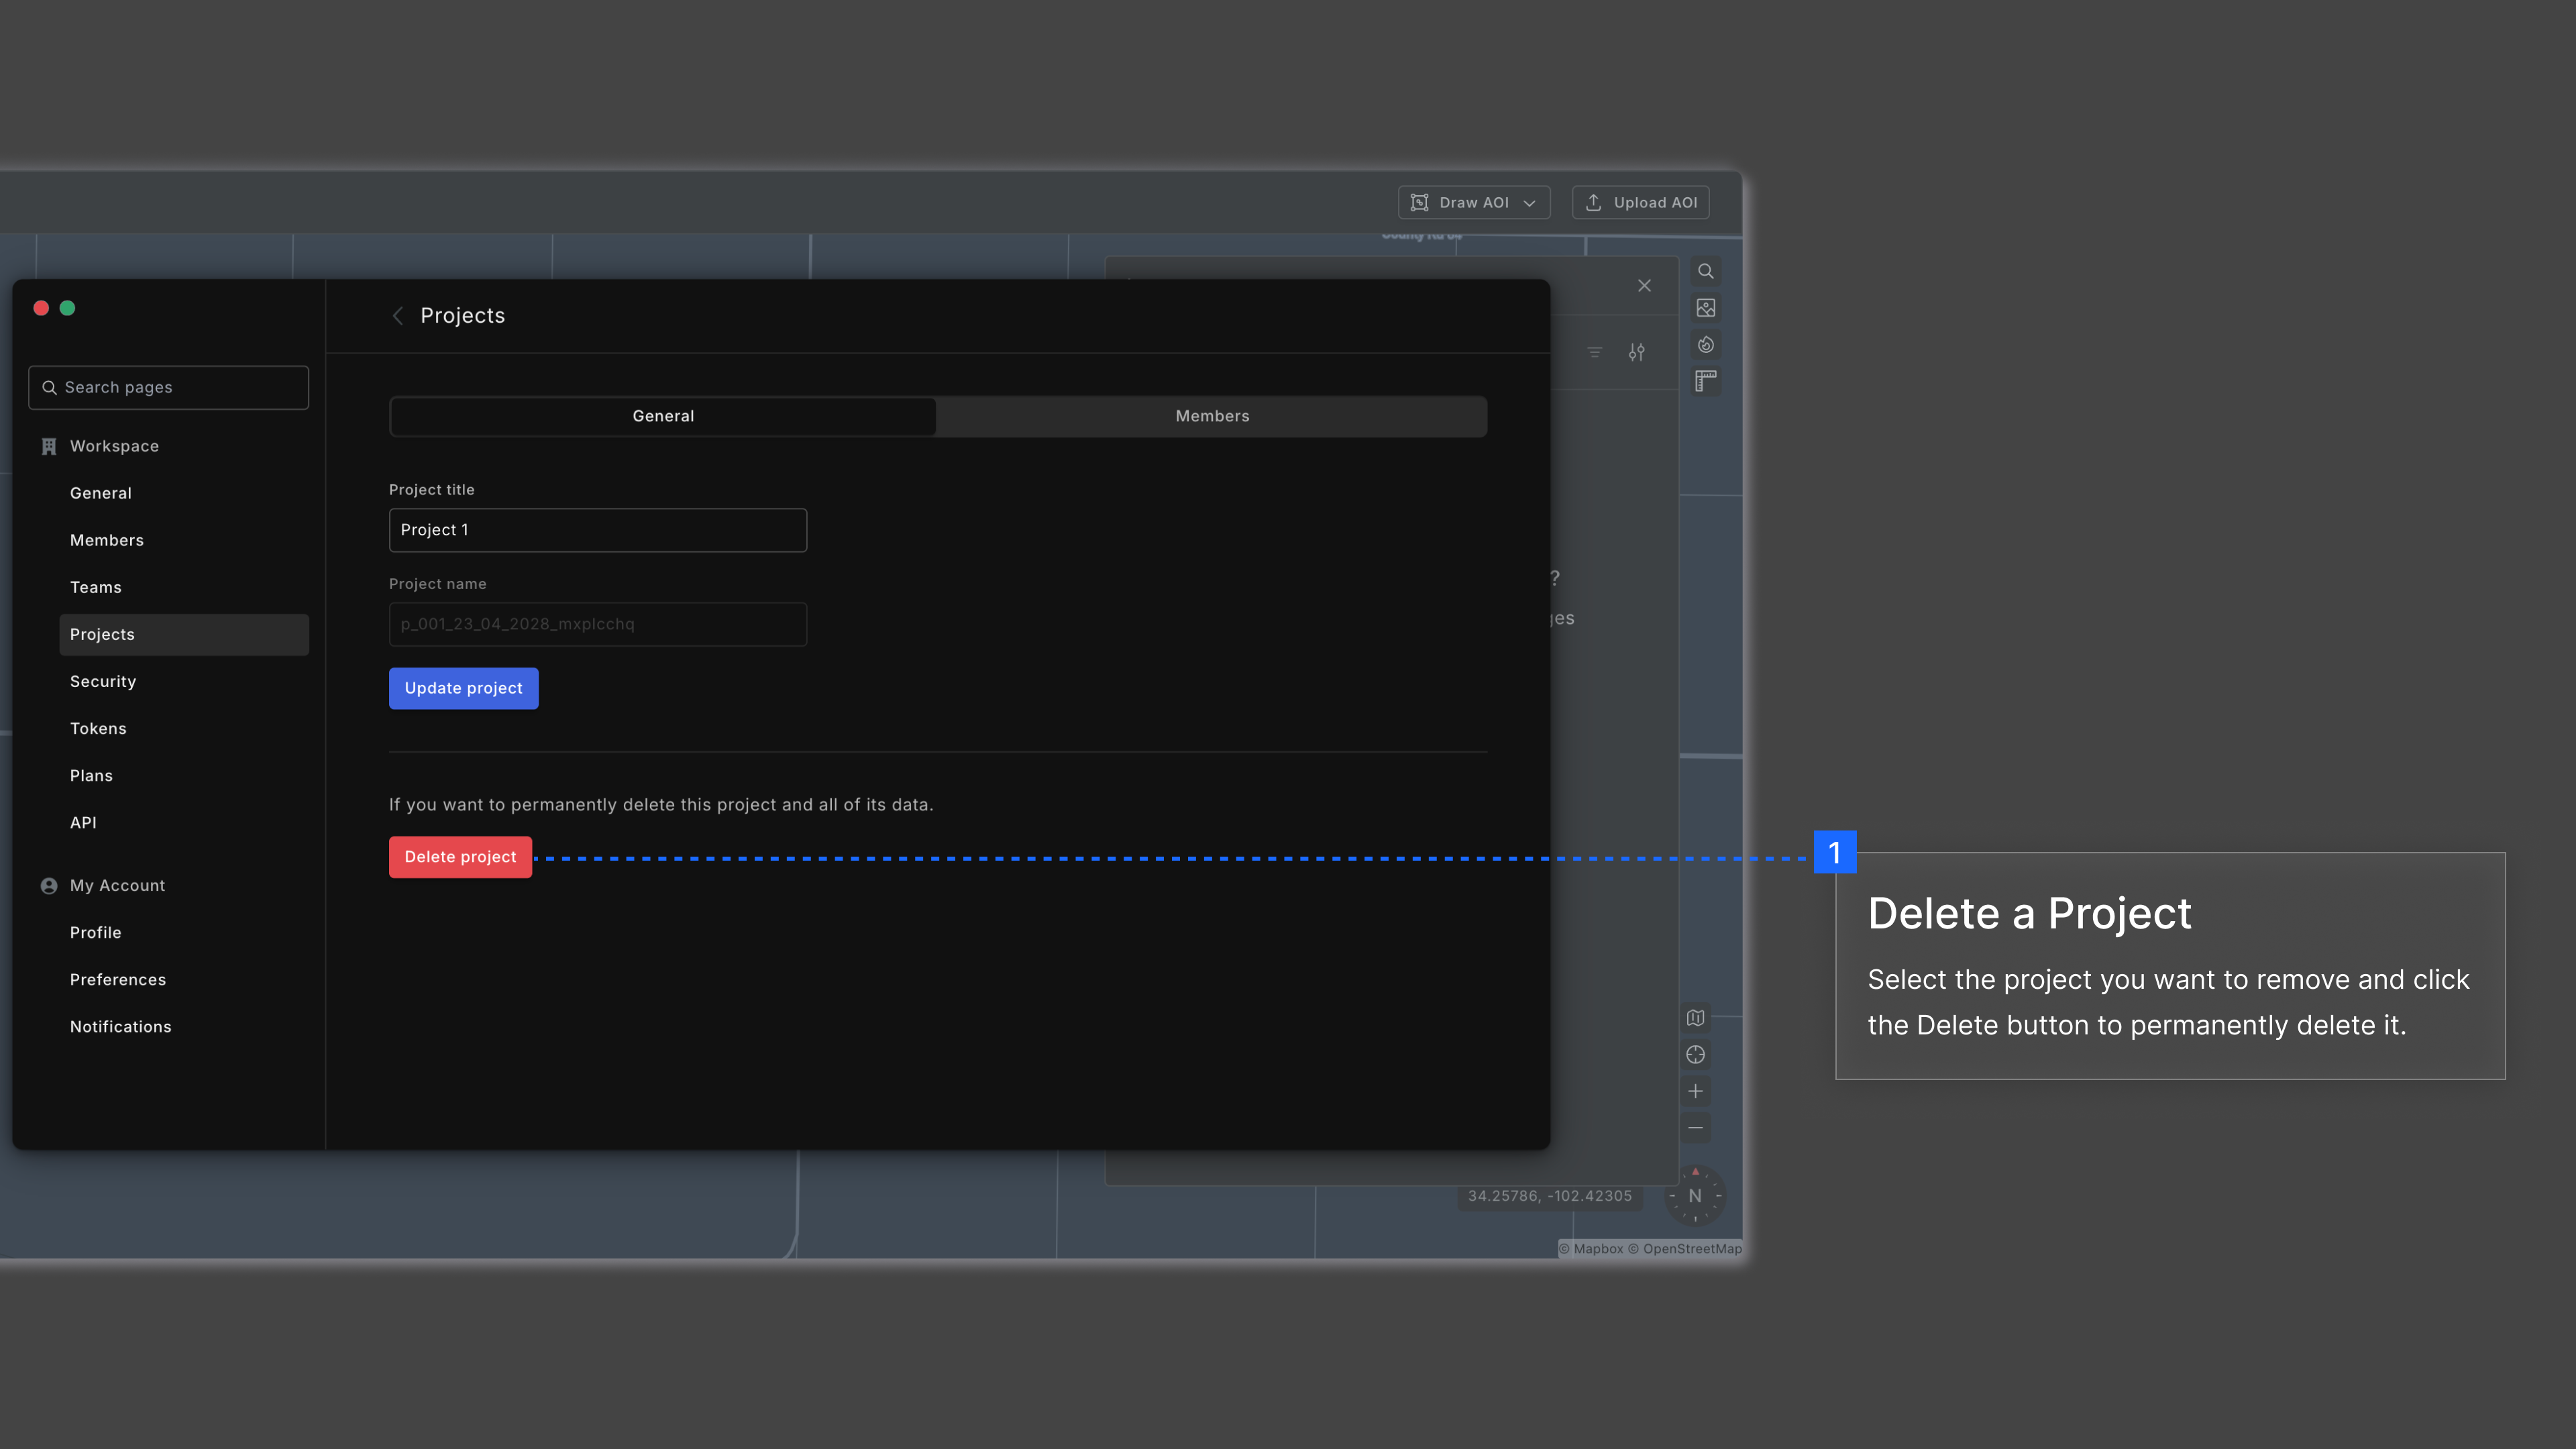
- Open Workspace Settings and navigate to the Projects tab.
- Choose the project you intend to delete.
- Click on Delete Project at the bottom of the pop-up.
- Deletion require an extra verification step where you need to type the project name.

- Confirm by clicking Delete this Project. This action is irreversible.
Note: Please proceed with caution before deleting a project. Deleting a project will permanently remove all associated Areas of Interest (AOIs), workflows, and related data. This action is irreversible and cannot be undone.