Area of interest refers to a polygon of vector file format encompassing the area of remote sensing image relevant to a user. You draw an AOI boundary (Area of interest) to show interest in the area covered by this polygon and its properties.The Area of Interest (AOI) is a crucial concept in Aurora, representing a specific geographic area in a vector file format like GeoJSON or .SHP. Your work in Aurora, from selecting satellite images to running analytical models, revolves around the AOI you define. AOI boundary creation would be the first step. Let us understand how to draw, upload, and use an AOI boundary.
Search Location and Draw an AOI
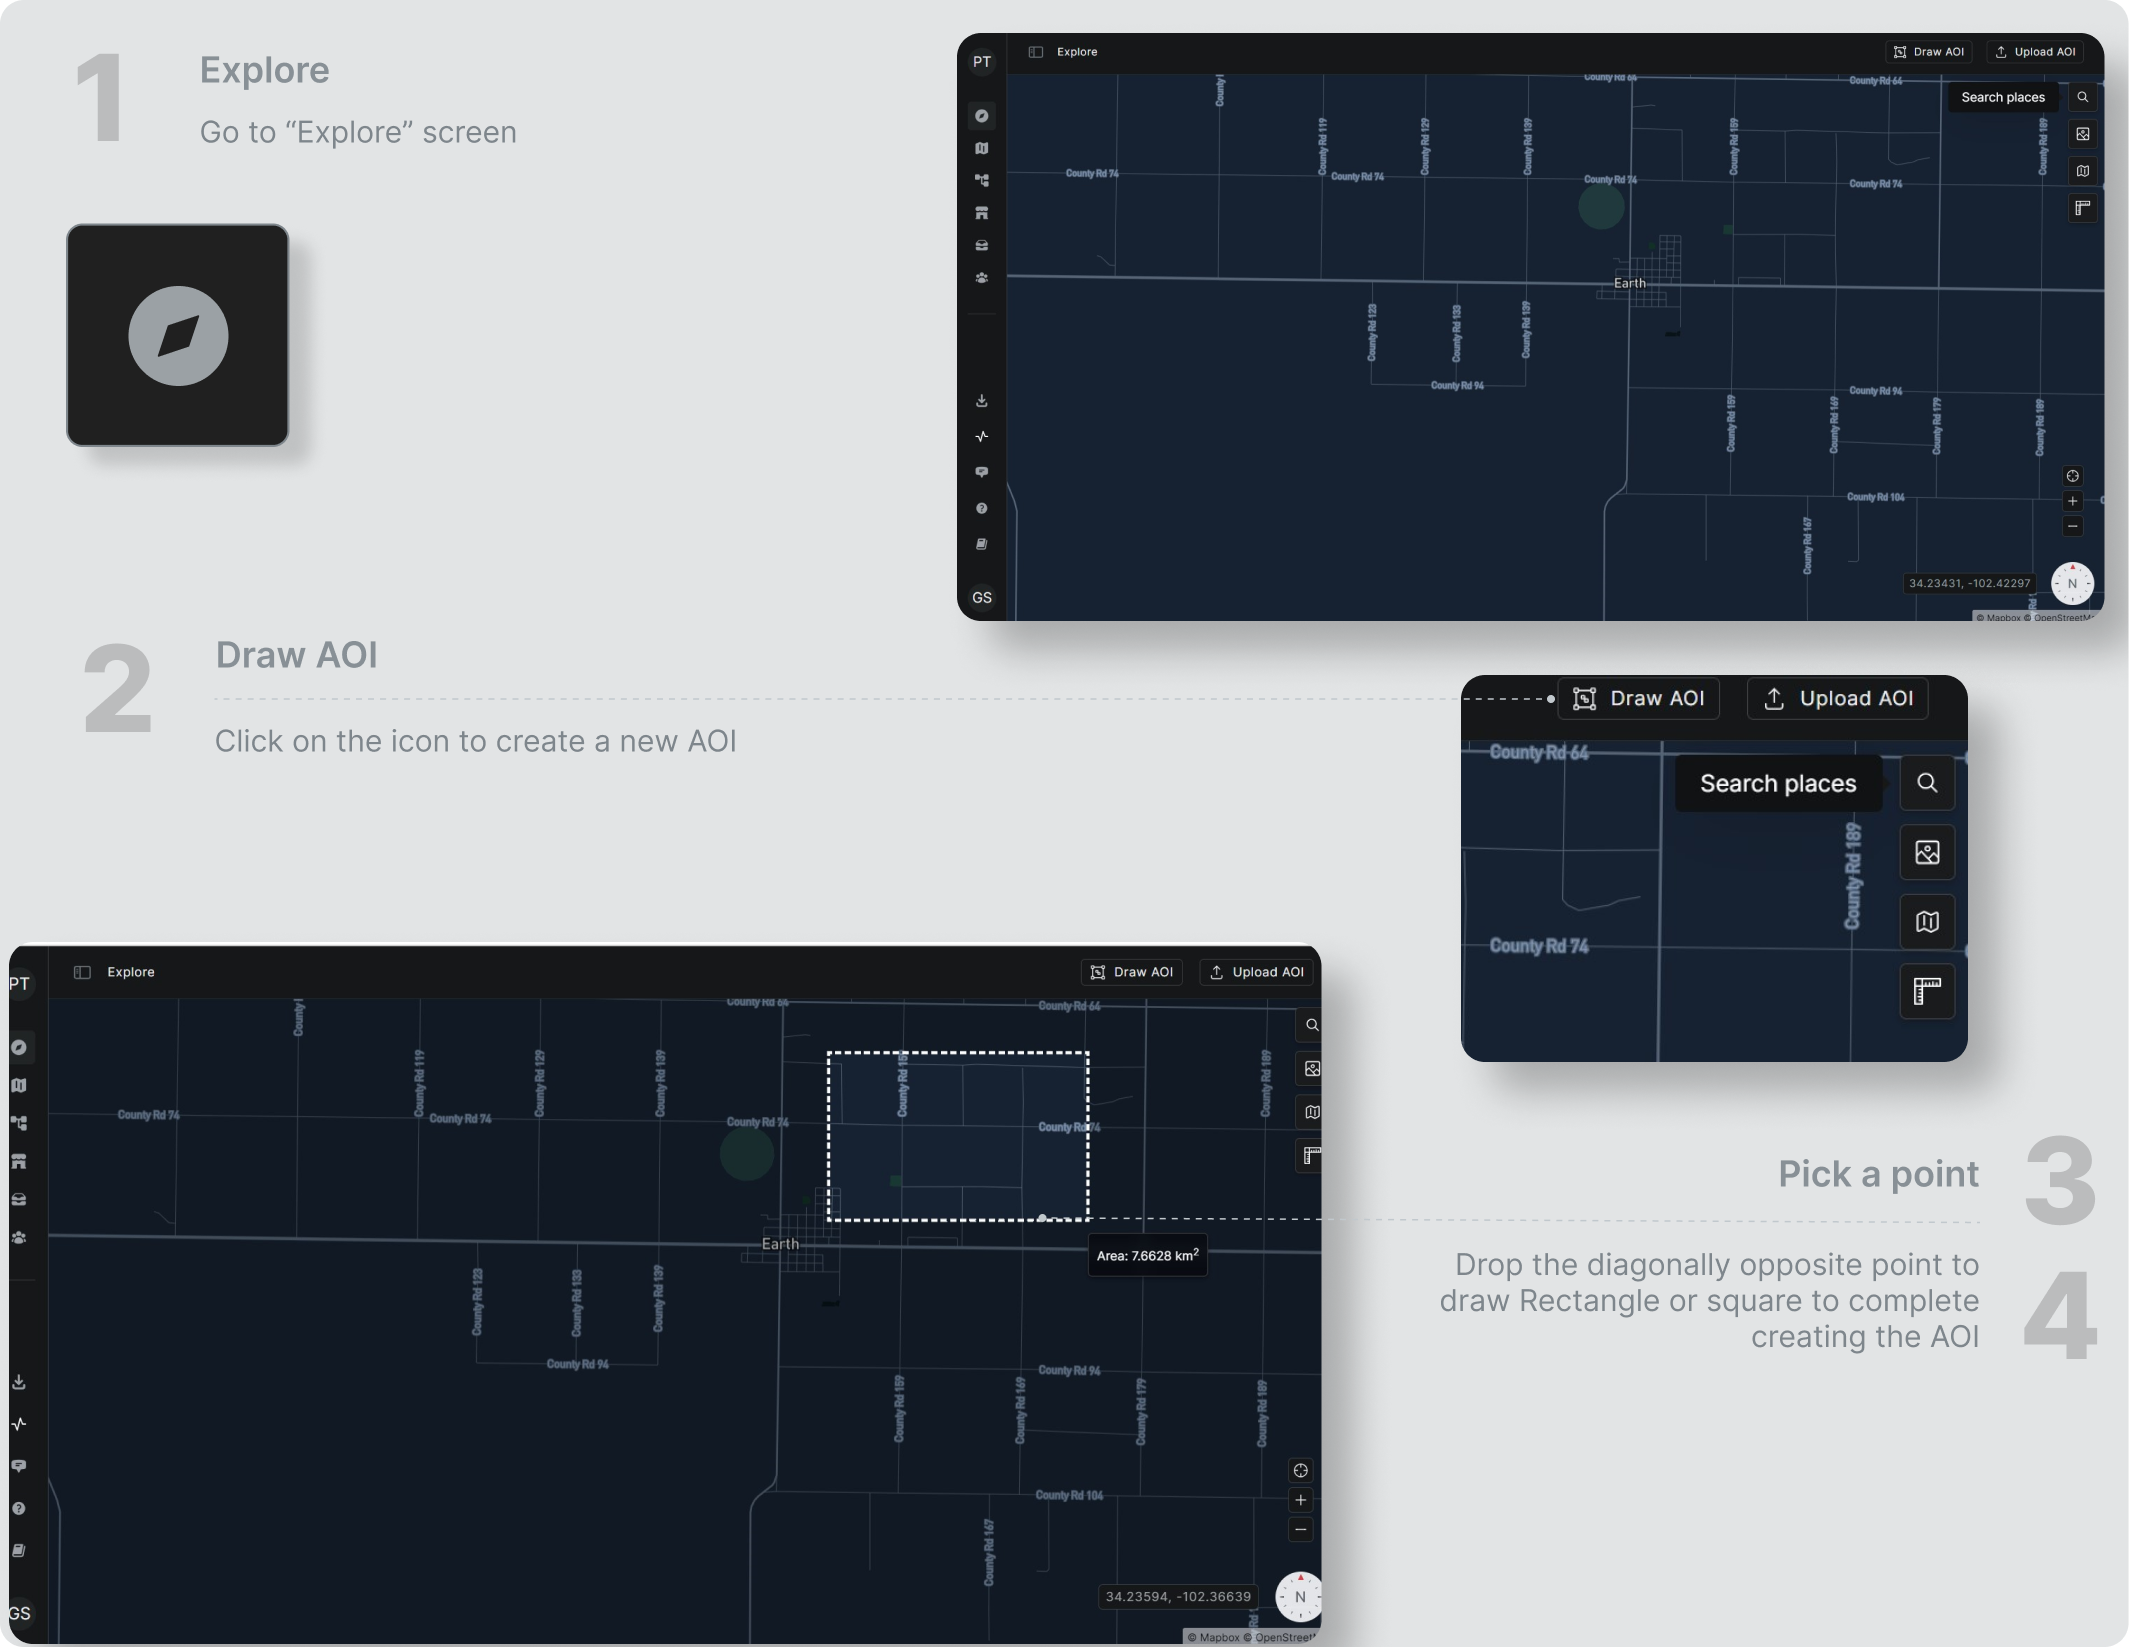
Aurora allows you to draw an AOI boundary or upload an AOI boundary. As per universal standards, an AOI polygon can be of any shape, but we support only quadrilateral (square or rectangle) for drawing. Later versions will introduce tools to draw an AOI boundary in different shapes.
- Search a location as per your requirement to create an area of interest boundary on the Explore Screen
- On Explore, a “Draw AOI” button is in the top right corner. Click on it.
- Start drawing the AOI boundary by clicking a point on the map.
- Now, you can see the diagonally opposite point moving along with your cursor.
- You can left-click and drop the diagonally opposite point to draw a square or rectangle based on how you want your final AOI boundary.

Upload an AOI
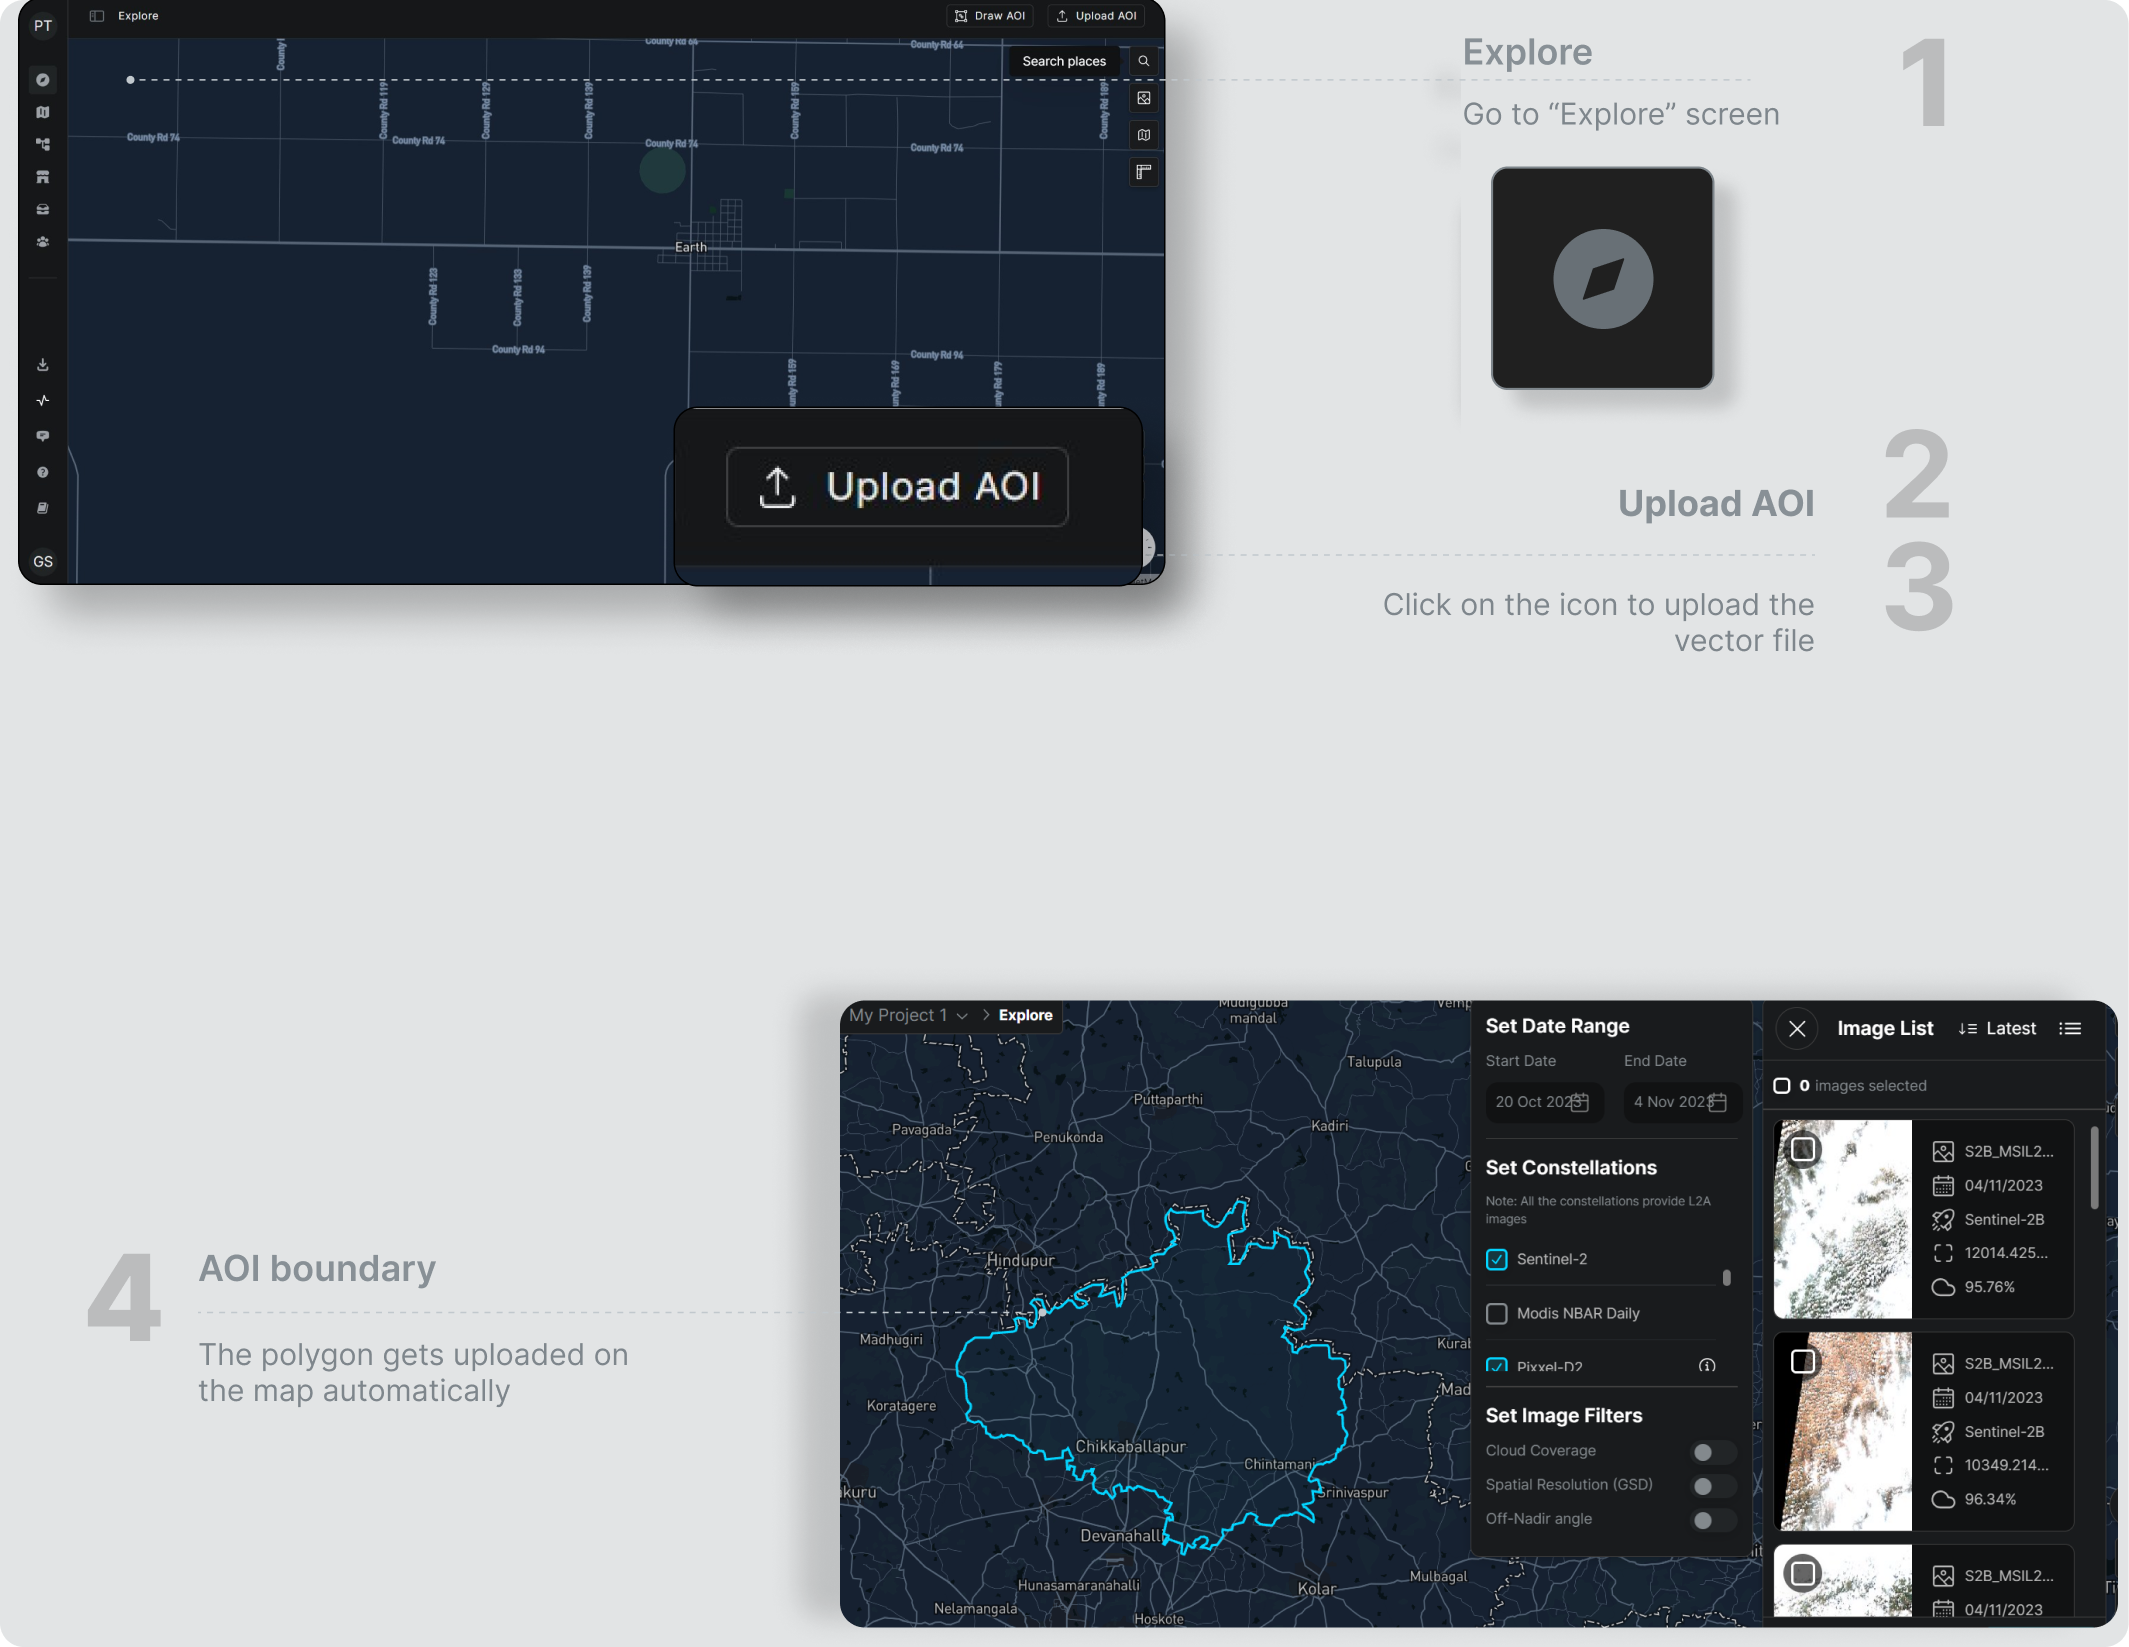
You can effortlessly migrate your already drawn AOI polygon file from any other software to Aurora. We offer support to all the major vector file formats such as GeoJSON, SHP, KML and GPKG. Uploading an AOI boundary supports all types of polygon files, given that they are continuous.Before we learn how to upload an AOI boundary, ensure you have the AOI vector file on the computer.
- To upload an AOI, you need to go to Explore Screen.
- On Explore, a “Upload AOI” button is in the top right corner. Click on it.
- A dialogue box will open on your screen. Navigate to the file location and select the file you wish to upload.
- You will see the AOI polygon on the explore map if the file is uploaded successfully.
