Documentation Index
Fetch the complete documentation index at: https://docs.pixxel.space/llms.txt
Use this file to discover all available pages before exploring further.
This guide outlines the steps to create or join a workspace in Aurora. It covers setting up a workspace, inviting members, and accepting invitations to collaborate efficiently.
Create a Workspace
- After email verification, you’ll land on the Workspaces screen.
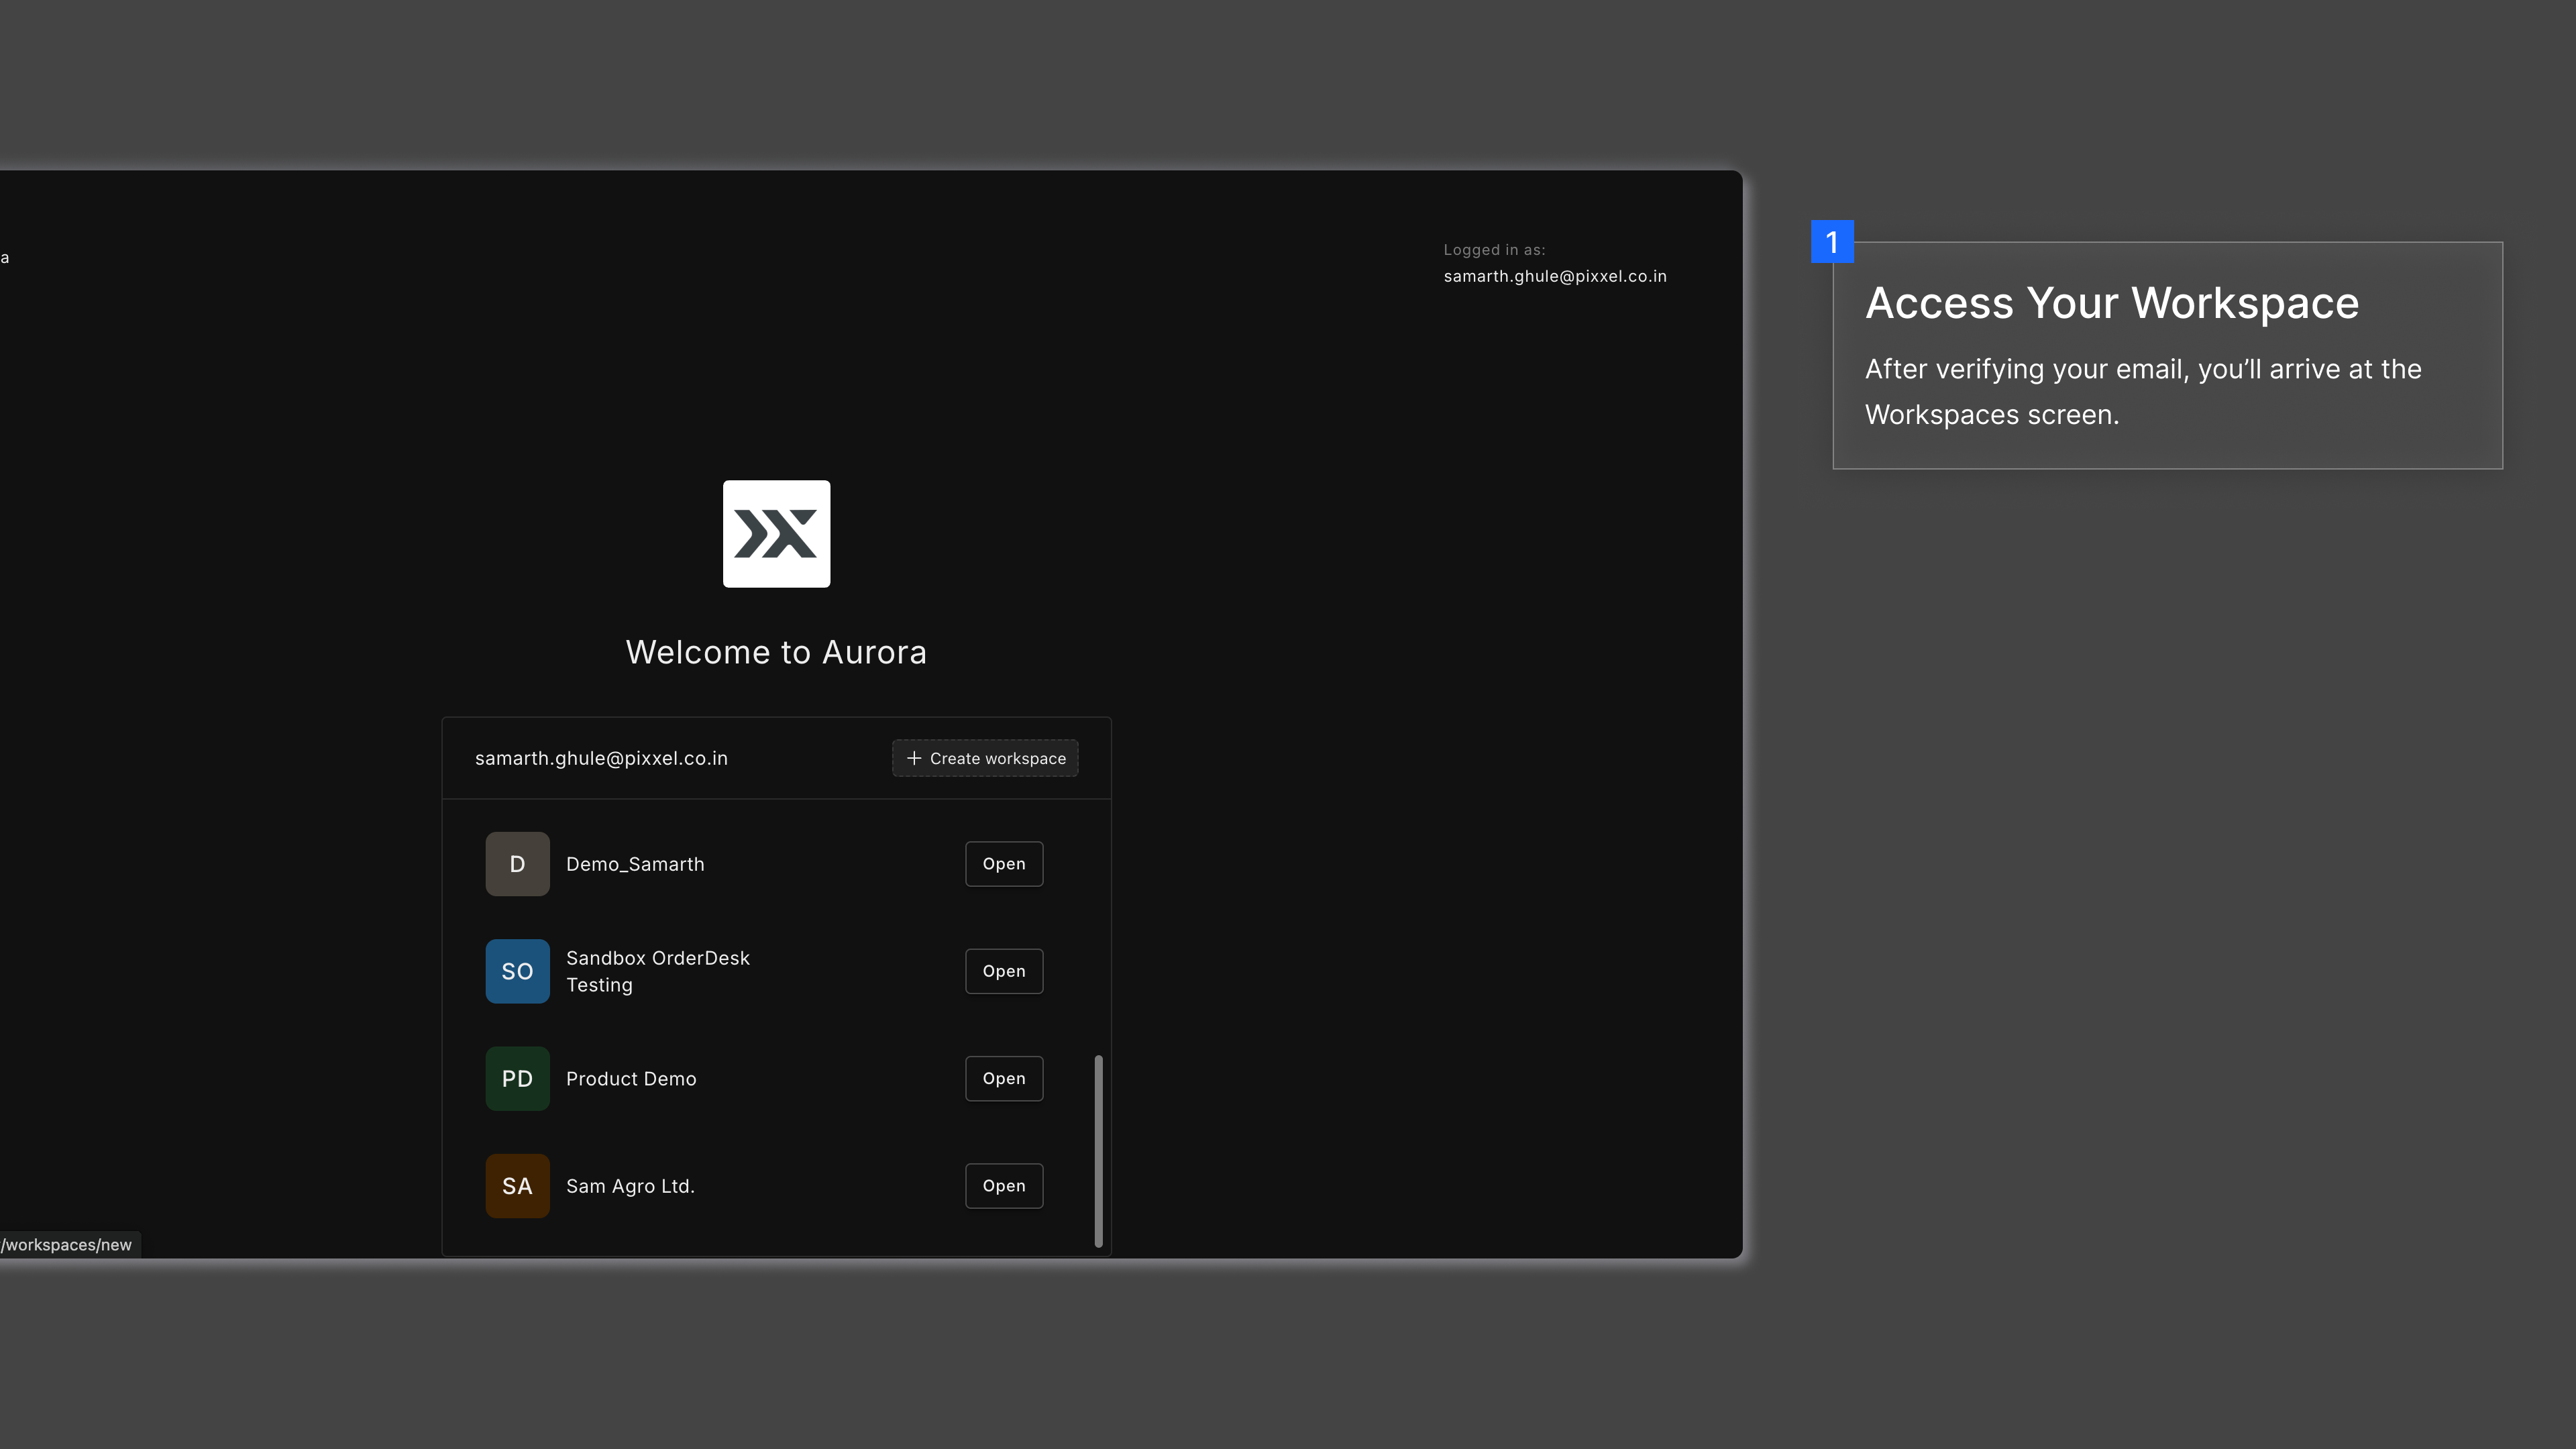
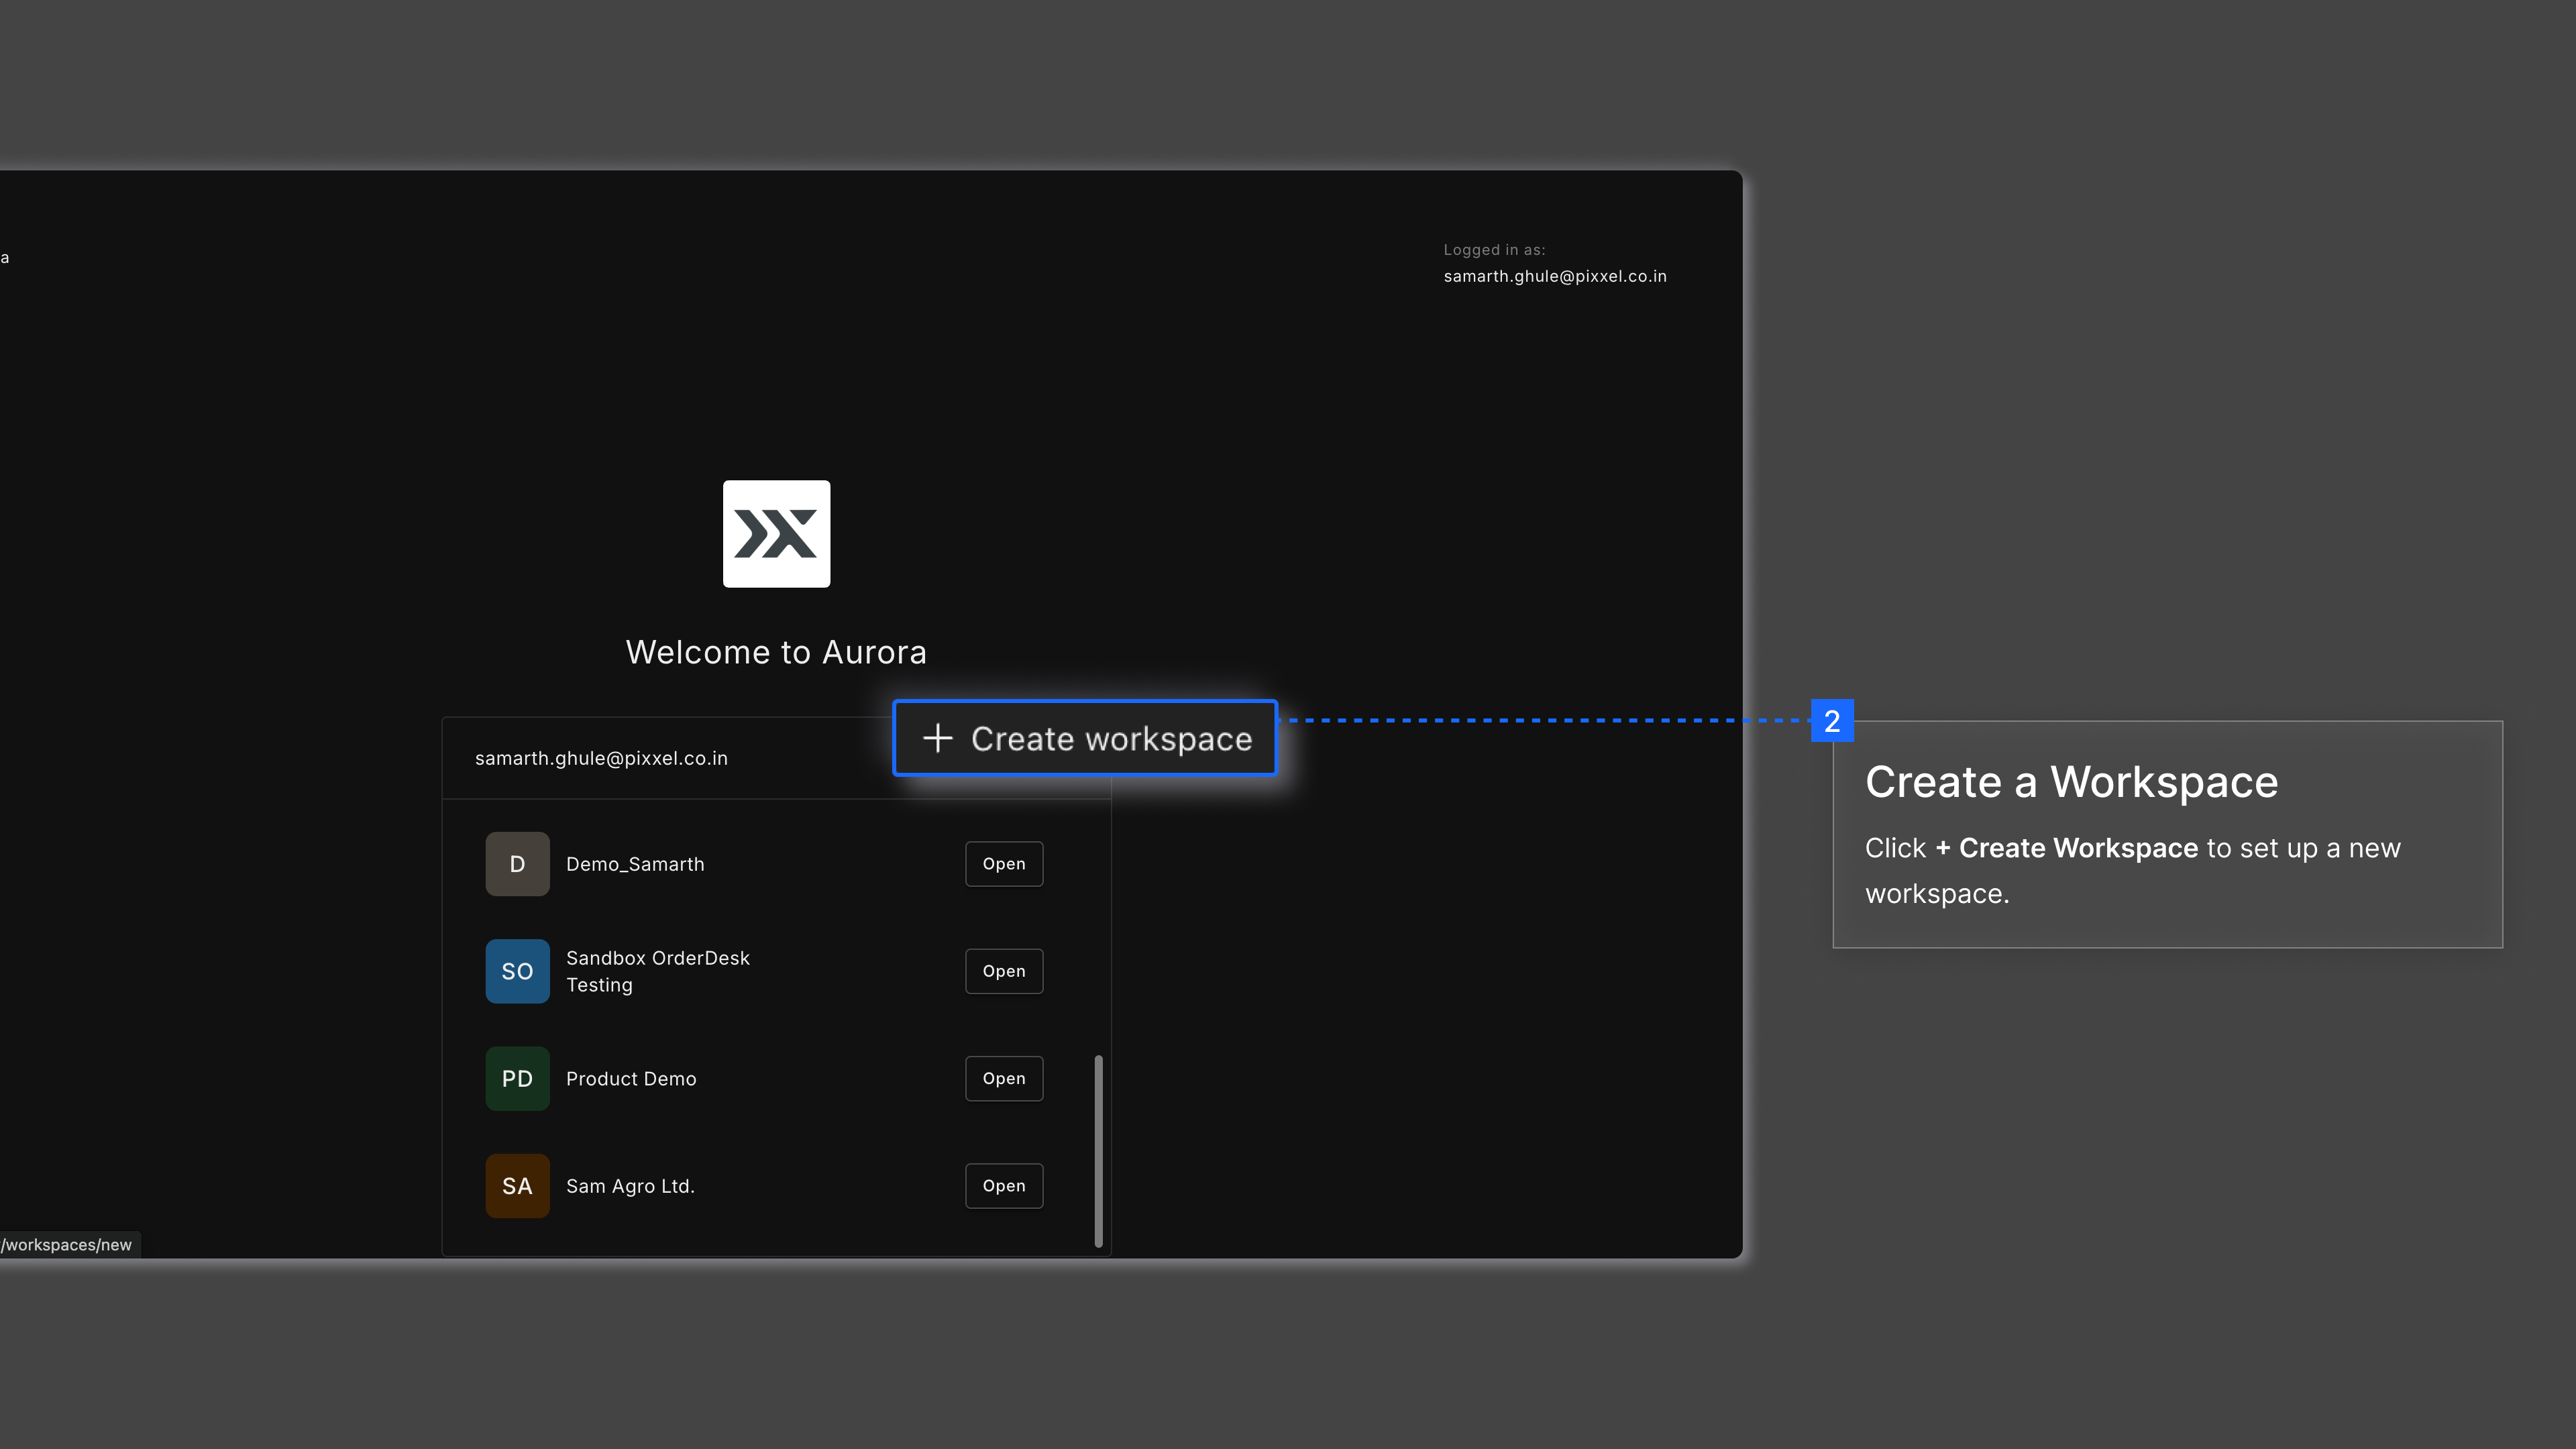
- To create a new workspace, click on ➕ Create Workspace.
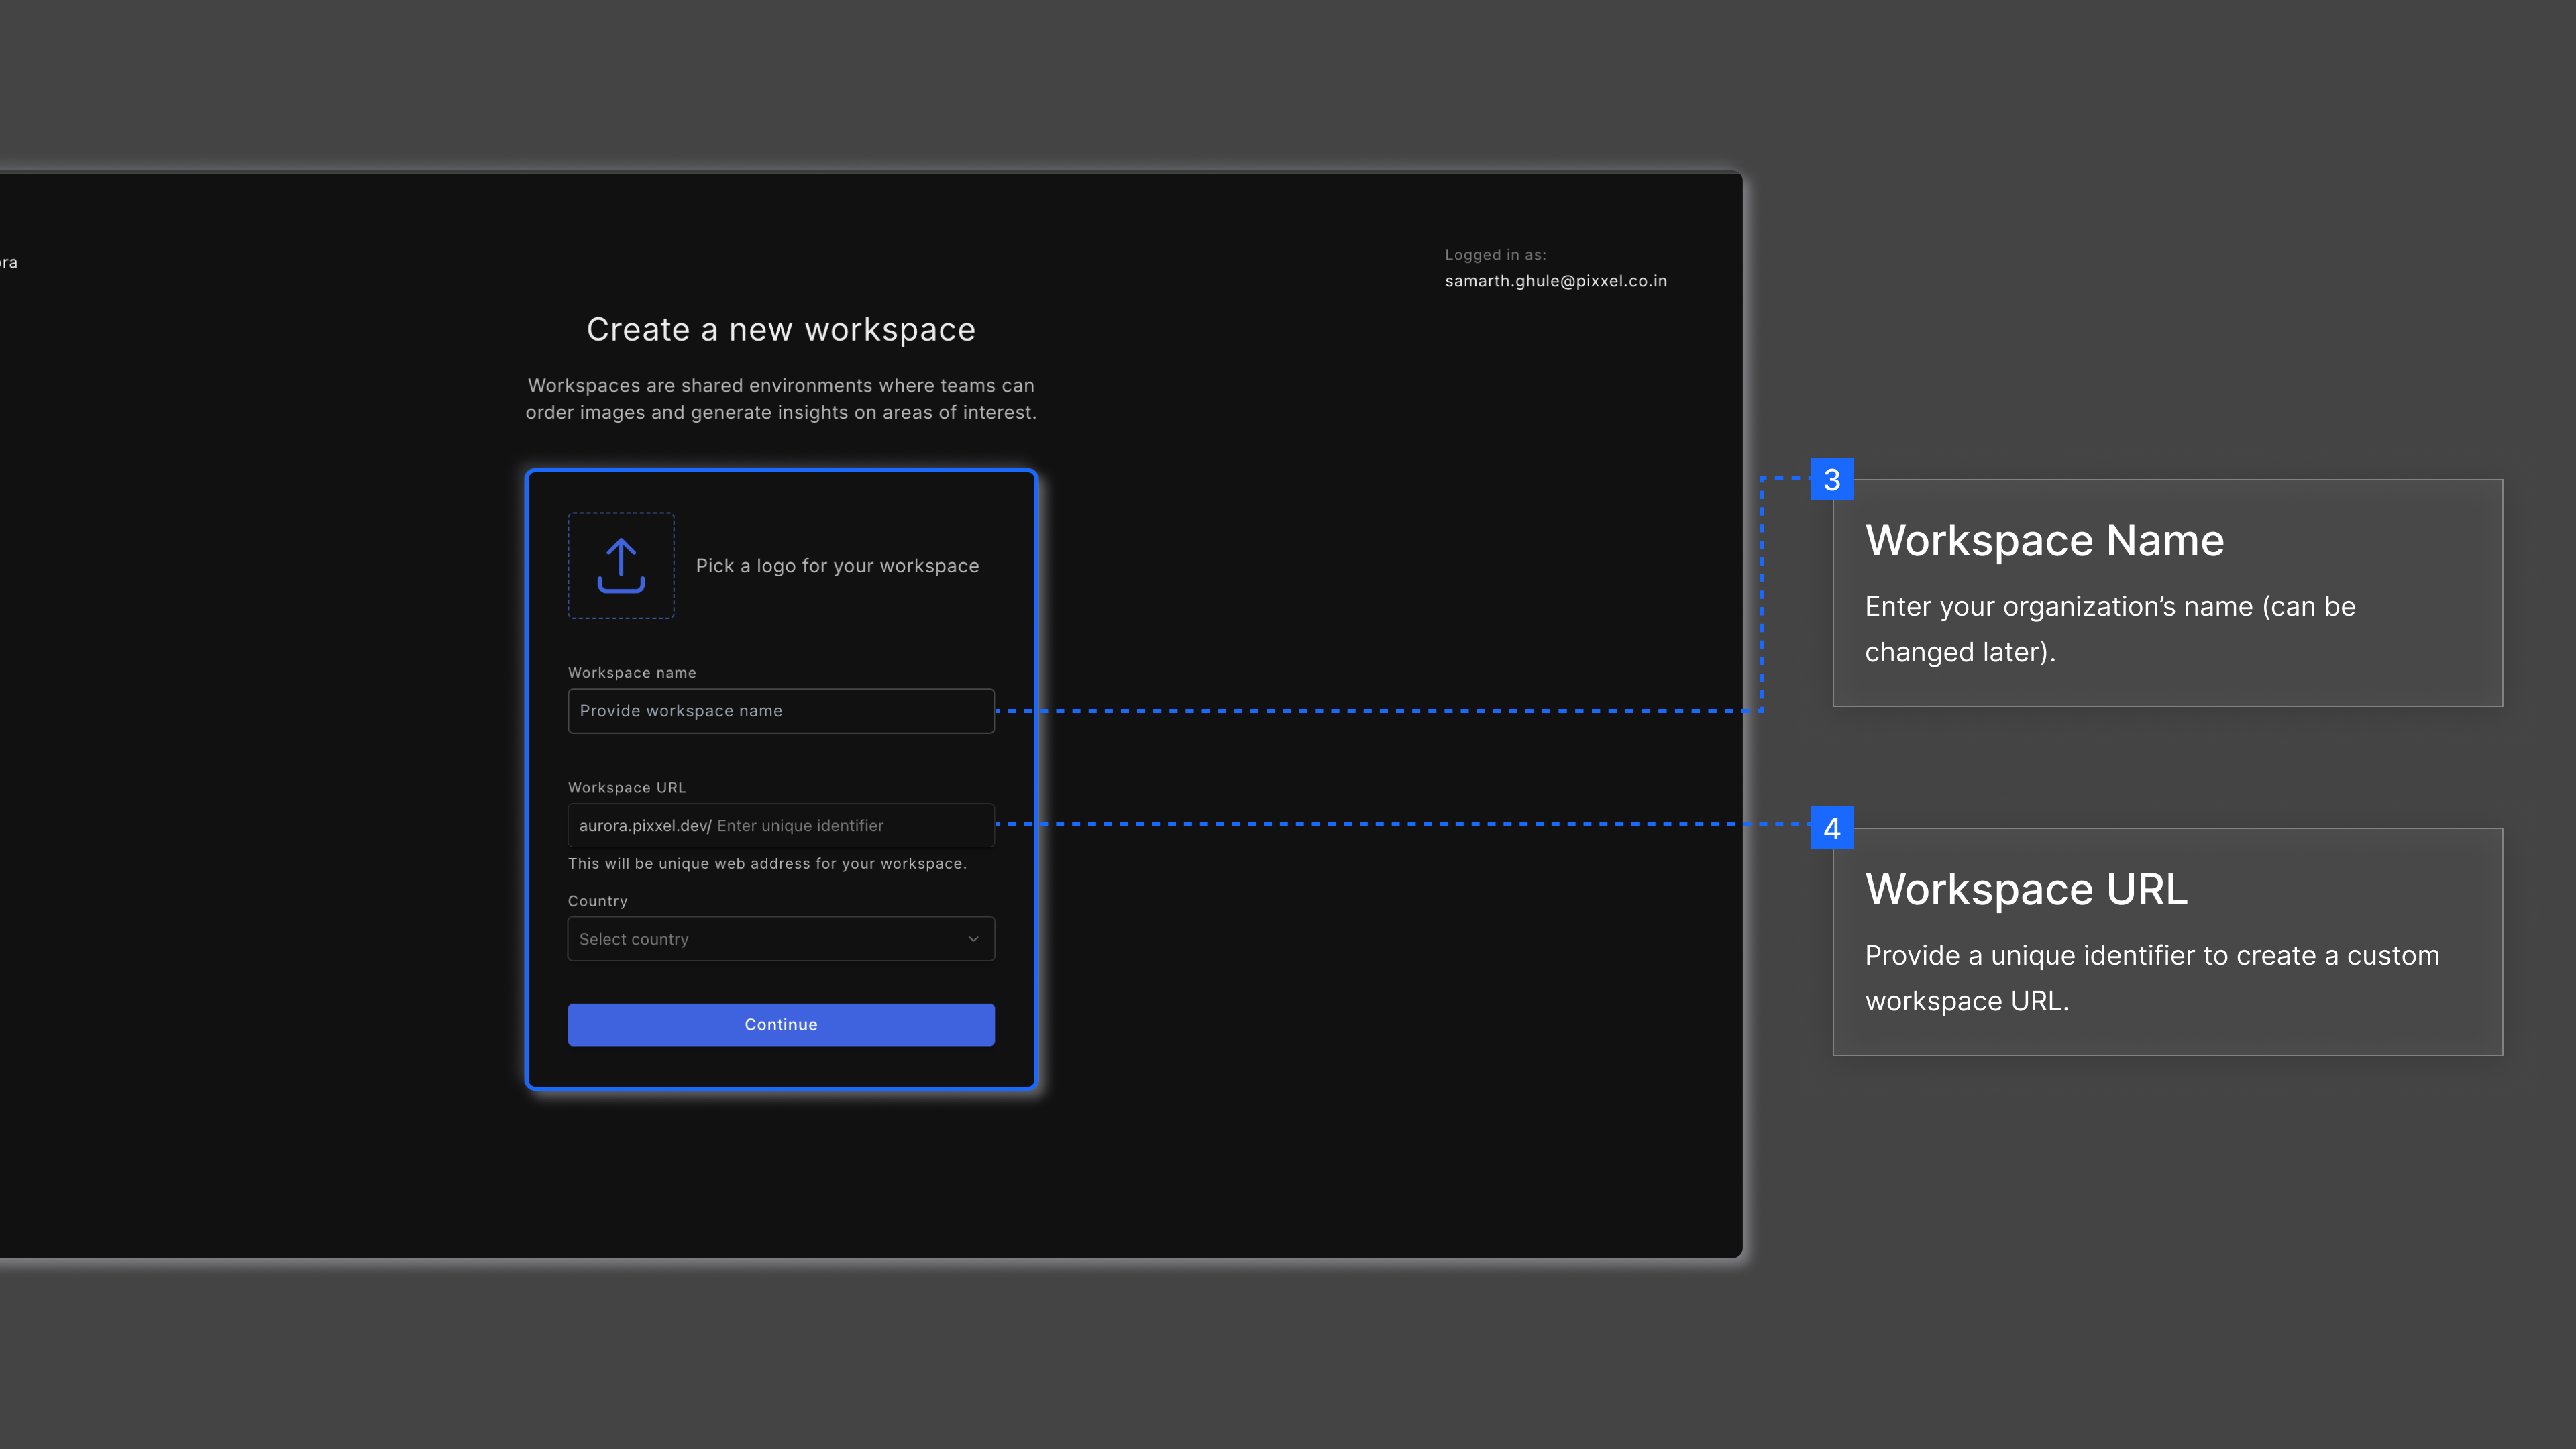
- Next, you’ll need to provide the necessary details for your workspace page.
- On submitting the details, your workspace will be created and you will be landed on the explore screen to start your journey.
Once the workspace has been created, the user (Workspace Owner) will get a notification/mail that says: Workspace successfully created which conveys that the workspace is now set up on Aurora.
Join a Workspace
- The workspace owner must send invitations for others to join the workspace.
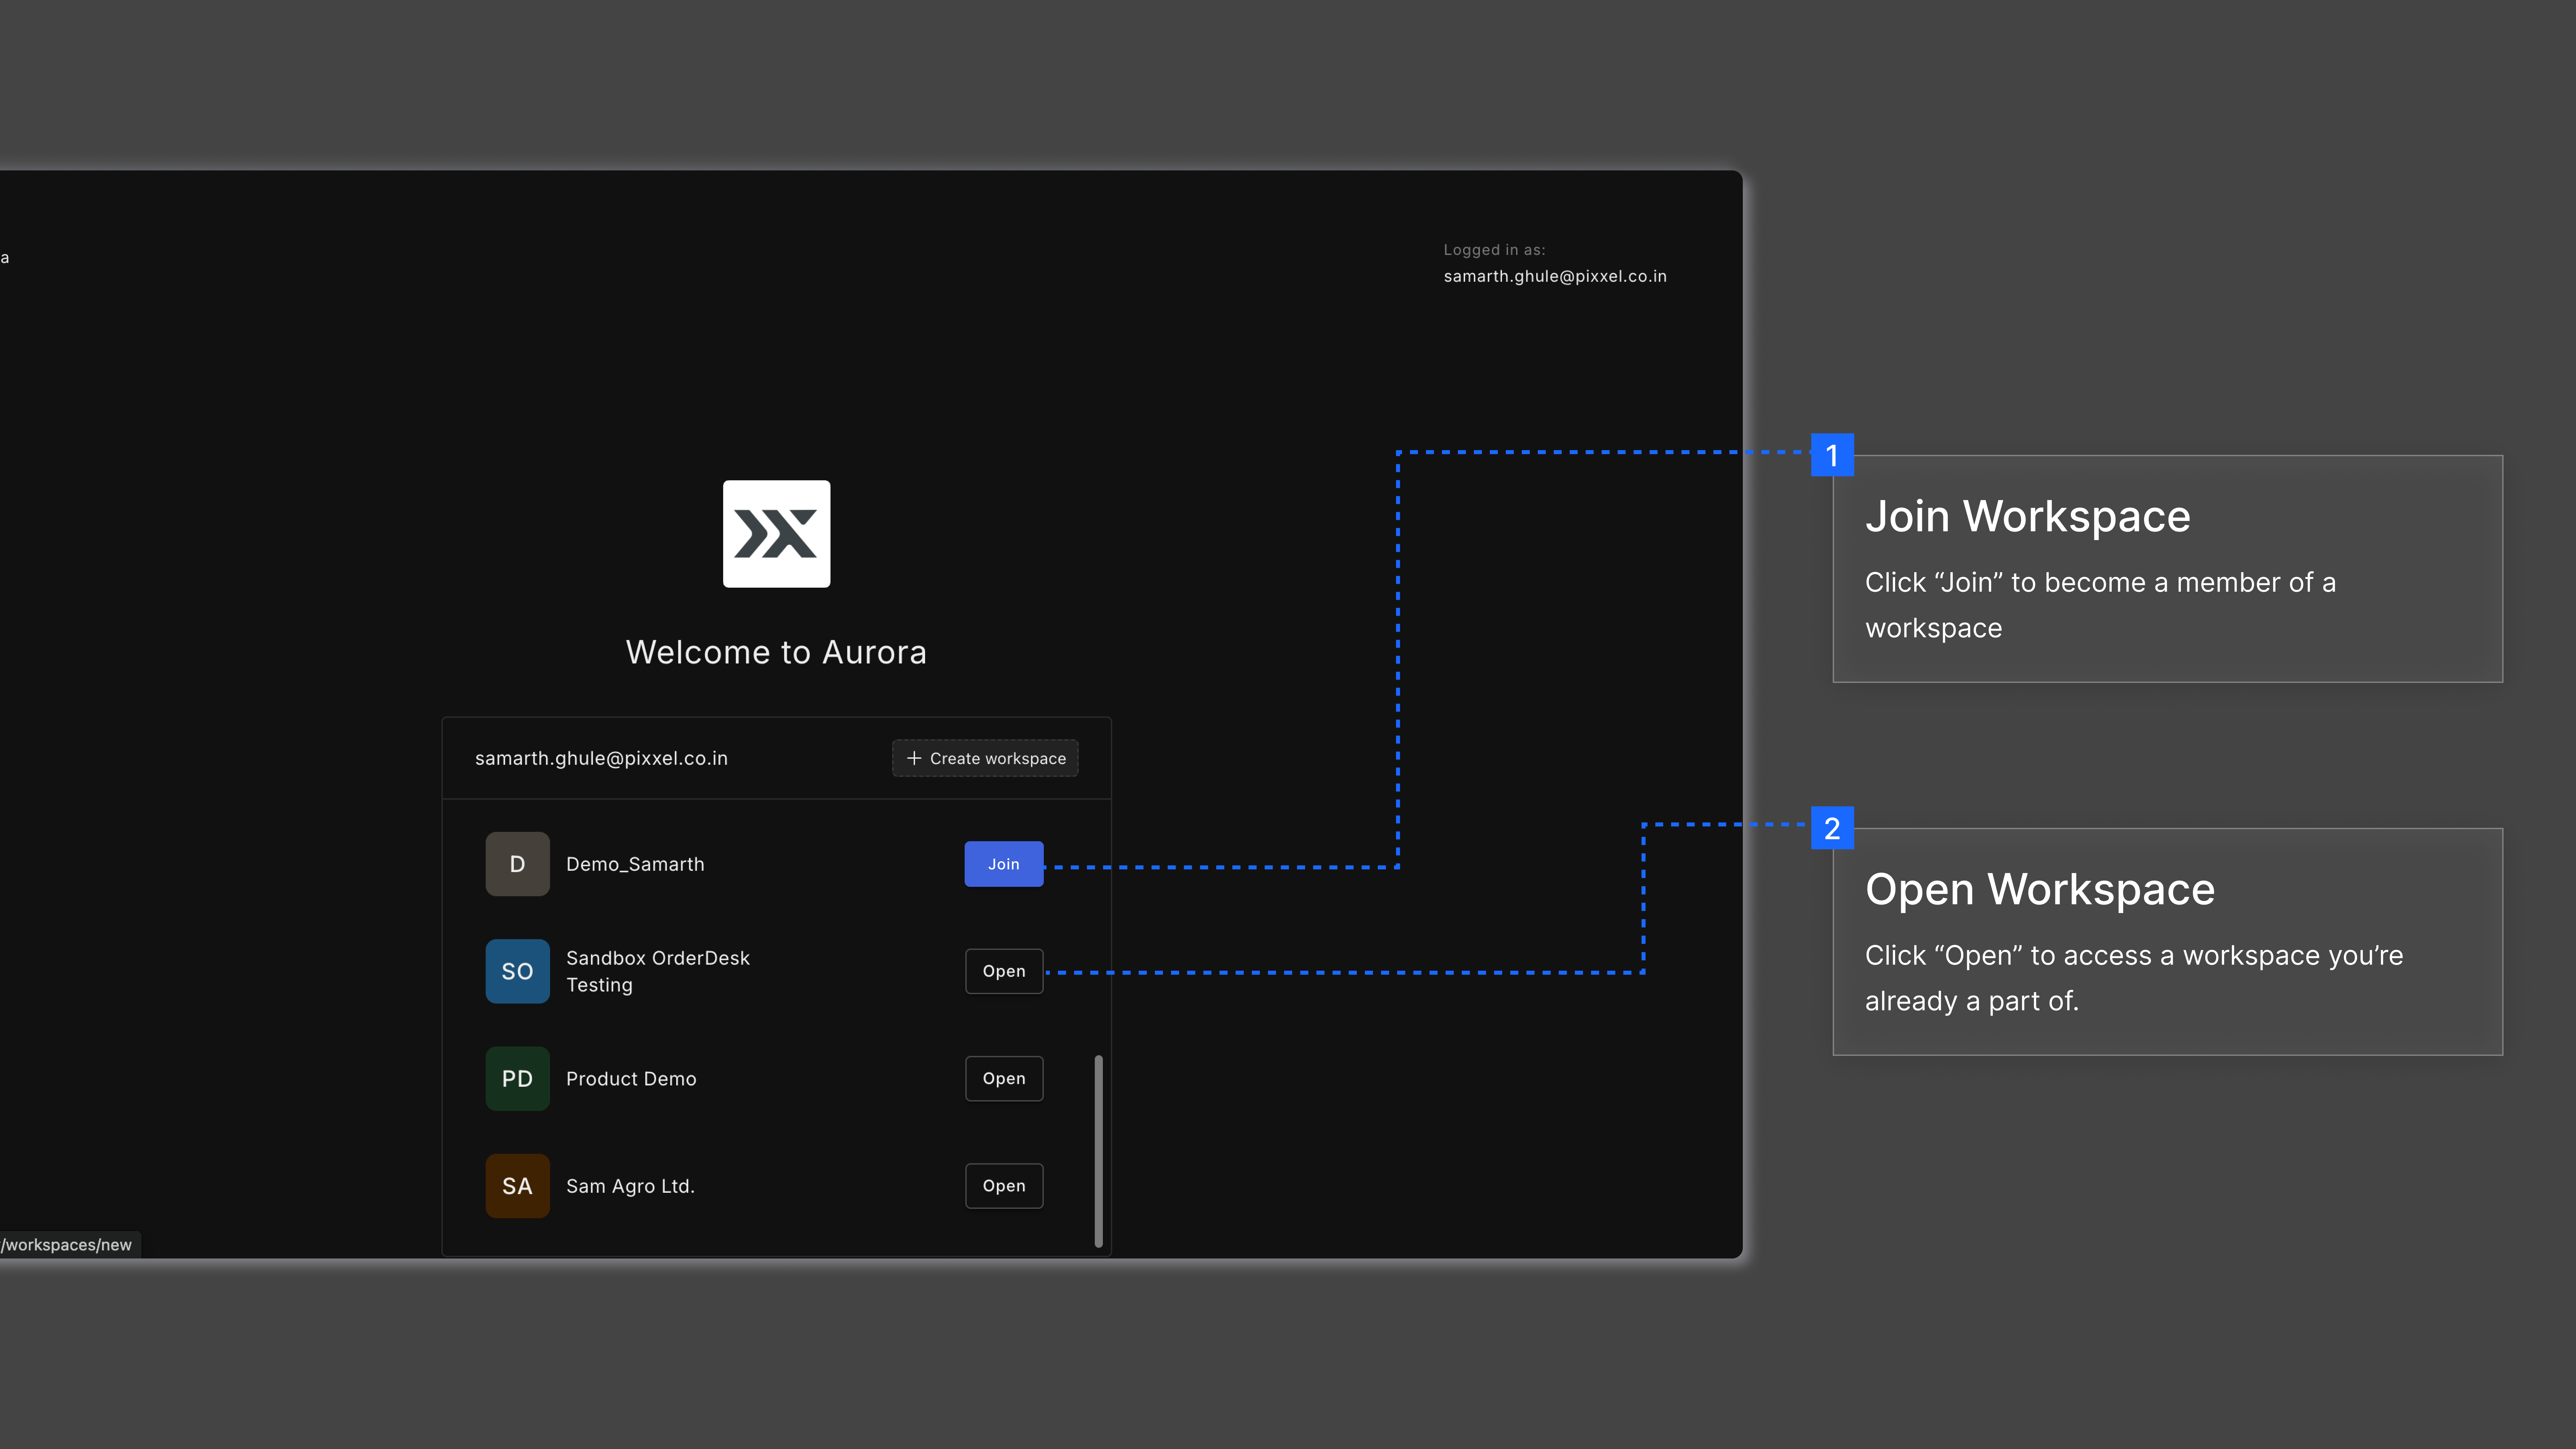
- Once you receive an invitation, follow the Sign-up process. You’ll then see a screen listing all the workspaces you’ve been invited to.
- Click Join to become a member or Open to access an already joined workspace.
After joining the workspace, the user will receive a You’re Onboard! notification as confirmation of successful onboarding.
Note: Workspace invites expire in 7 days, so join promptly.